Fintech 360 overview
Welcome to the Fintech 360 CRM Documentation! This guide is designed to provide you with comprehensive information on our CRM system and help you utilize its features and functionality to their maximum potential.
What is Fintech 360?
Fintech 360 is a CRM system to manage all customer communication and collect the history of all customer activities. CRM enables you to build long-lasting relationships with your customers from the first point when a customer joins the brand and across the entire customer journey. CRM stands for “Customer Relationship Management” and ensures all customer interactions happen smoothly and efficiently.
Fintech 360 allows you to automate customer-related workflows to boost loyalty and drive profits. With CRM, you can collect customer data to build full customer profiles and provide maximum productivity of customer-facing teams.
The system covers various features:
- Customer 360 profile
- Verification
- Trading platform
- Payment gateway
- Marketing network
- Business intelligence
- Websites and CMS
- Cashier
- Configuration tools
How does CRM work?
Fintech 360 includes a customer database and trading tools to work with diverse customer data, workflow automation features, analytics, and other features such as website configuration. By using those features, you can manage trading activities and engage your customers.
All business employees must have a CRM user to log in to the system. A user is an account with credentials, included to some role and department.
Belonging to a role and department determines the set of user permissions. For example, a user can have restricted access to some sections or actions performed and work only with the customer’s data assigned to the user’s department.
- The list of CRM users and role assigned is managed in the Users section.
- The company departments are configured in the Departments section.
- The access is set up in the Roles and Permissions section.
CRM tools
A new customer record is created when a customer submits a webform or creates an account in the Client Area. In Fintech 360, you will be working with leads (potential customers), clients (registered customers), and depositors (customers with confirmed deposits).
- All lead, client, and depositor data are stored in the Customers section.
- Use the Customer Splitter to automate and optimize the assignment of customers to agents.
- With the Assignment rules (Lead splitter) you can setup the automatic assign a lead to the department based on the country origin.
- Use Regulation to set up customer trading permissions and limitations to ensure all customer actions are legal in the region of activity of your brand.
- The Send SMS and Documents section help to manage the document verification flow.
Trading and payment tools
A customer can have a live and demo trading accounts. The first live trading account is created automatically when the first deposit transaction is approved. A CRM user can also create a trading account manually.
- The Trading Accounts section is designed to manage all customer trading accounts.
- The configuration of trading accounts is set up in the Trading Groups Config section.
- Use the Transaction and WD Requests section to track the movements of funds on trading accounts.
- In the Payment Configs section, you can set up how customers can transfer money to their accounts and fine-tune how the system handles payments.
- Use the Fees section to set up the rules for charging fees from customers.
Interface overview
Fintech 360 interface can be seen as having two areas.
- Navigation panel. The main tool for navigation in the system.
- Working area. Your main workspace. Functionality varies depend on opened section.
Let us look at the functionality in more detail.
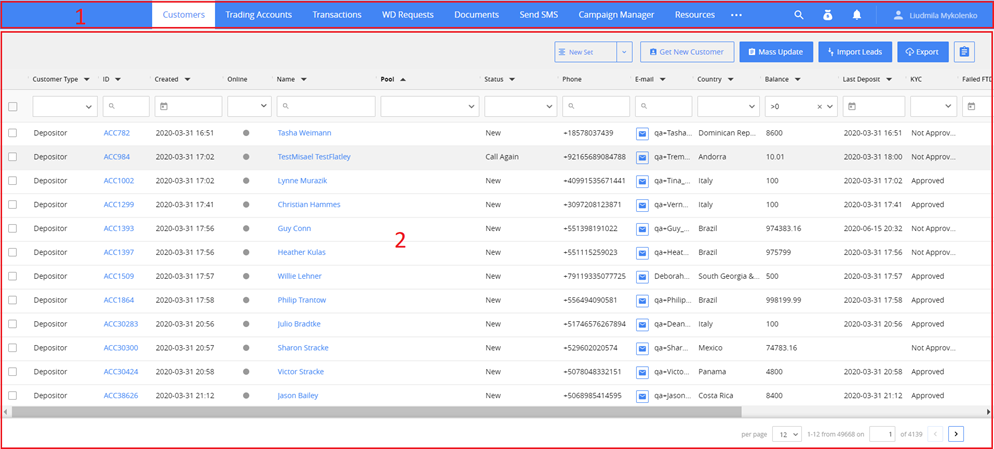
Navigation panel
![]()
1. Sections. Use the panel on the top to switch between sections in a work process. The open section is highlighted in white color. Depending on your screen resolution, the list of the sections may be continued in the menu of Overview Overview inline 1 button. You may need specific permissions to see some sections on the panel.
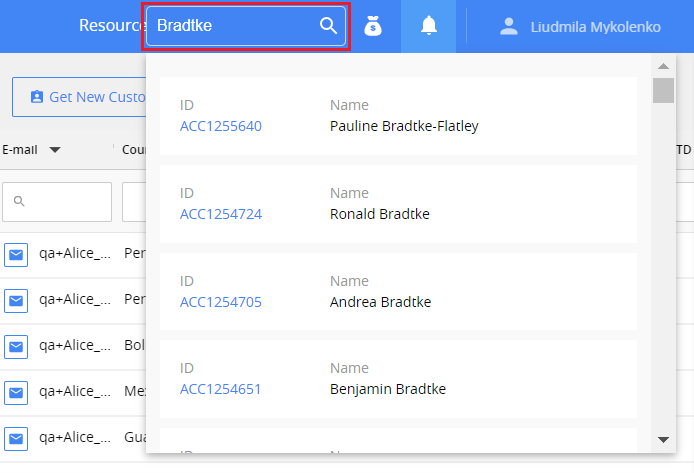
2. Search bar. Use the search to quickly find a customer by their name, ID, phone number, or Email. The bar is available only in the Customers section.
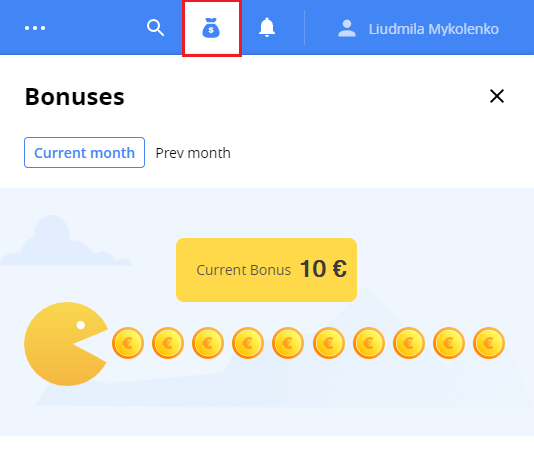
- Employee bonuses. Shows bonus amount gained by you in the current and previous month.
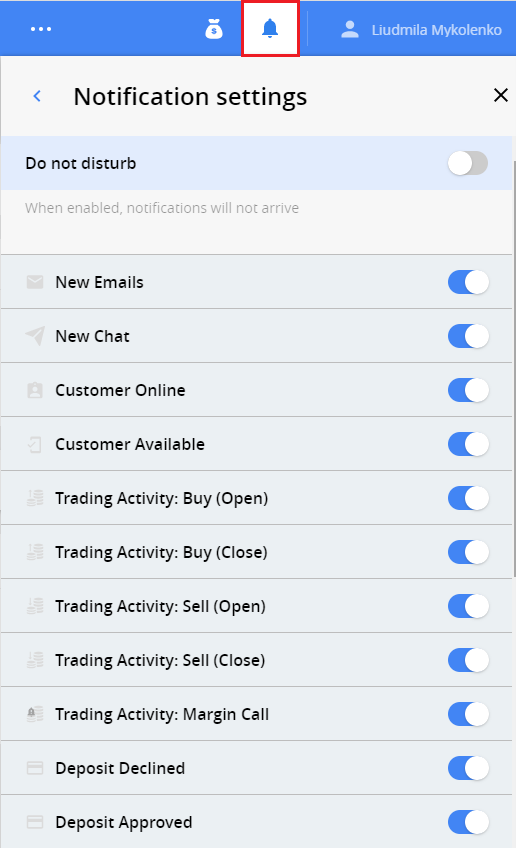
4. Notifications. Displays notifications about the events you may be interested: new emails, availability of the customer, trading activity, etc. To manage the list of notification events, click Settings link in the bottom of the page.
5. User profile. Displays the name of the logged in user. By clicking it, you can open your profile settings to see your role, department, or change the password, etc.

Working area
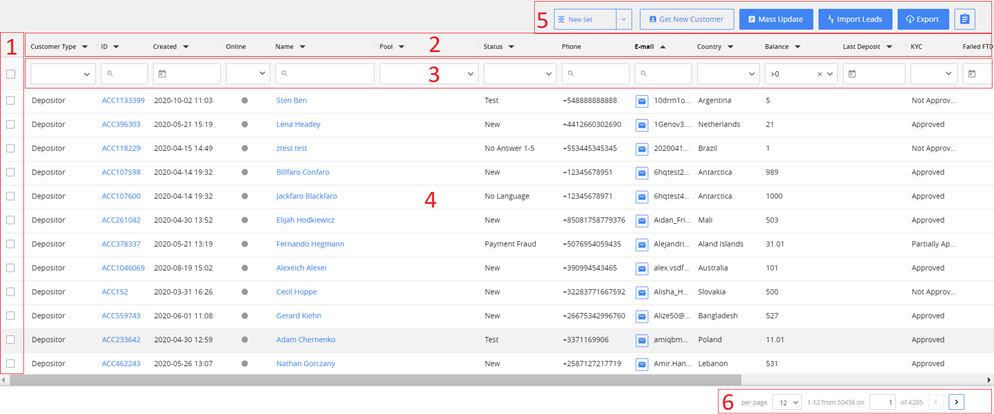
The functionality of the main area varies in different sections, but in most of the sections, you may find similar interface elements:
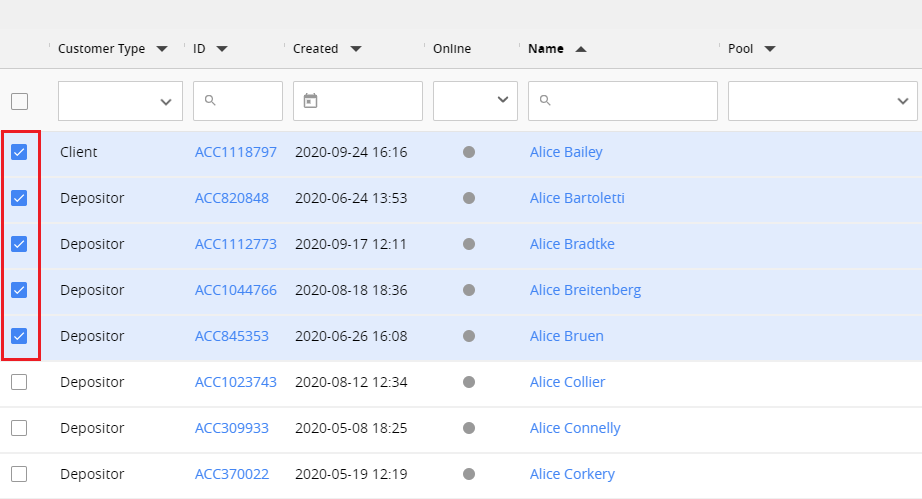
- Selection tool. Here you can select all the records on the page by clicking the checkbox on the top. You can also select manually some records. Usually, it is used to apply some mass actions.
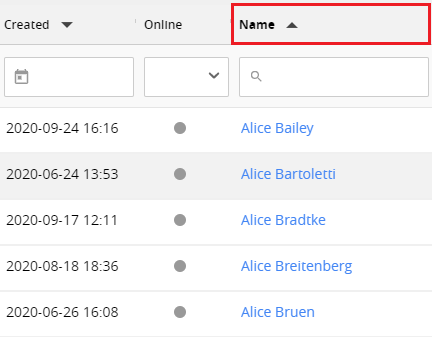
- Column captions and sorting. You can sort the records in the grid by the values in the selected column in ascending or descending order. To sort records, click the column caption. The sorting order is indicated next to the column caption. The sorting column is highlighted in bold.
- Filter panel. Use filters to display only the records with specific values in the column. You can set one or more filters at the same time. See more: Filter records in the grid.
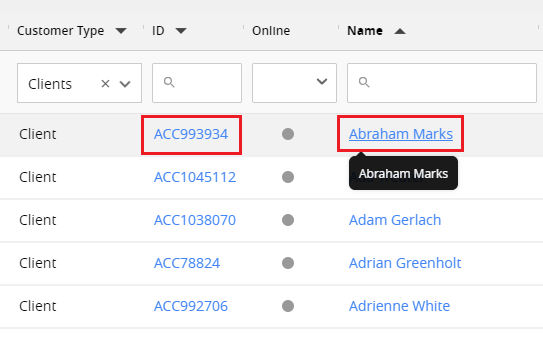
- Main grid. Here you can work with the section records. The columns represented in grid can be customized in each section separately. See more: Customize columns in the grid. By clicking the links in the grid, a separate card with detailed information about the record will be opened.
-
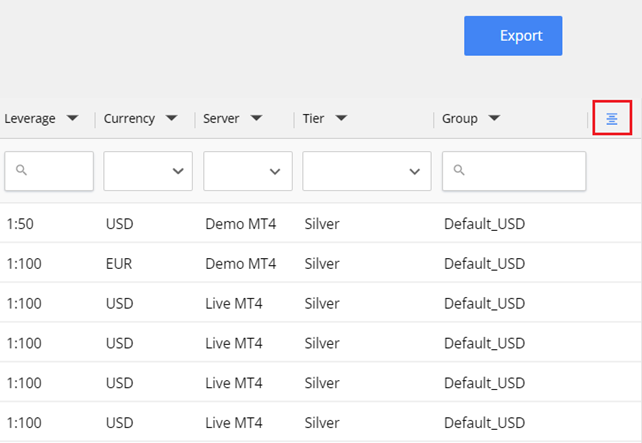
Actions. The set of actions varies for each section. For example, it may be Export to Excel or Mass Update records.
-
Pages control. At the bottom of the page, you can set up the number of records displayed per page and move forward or backward to display data from other pages. You can also manually input the page number to which you need to go.

Customize columns in the grid
The main grid in the sections can be set up individually for each system user. You can add or remove columns from a list, reset to default settings, and adjust column width.
To customize columns :
1. Click Customize column button to the right of column captions.
Due to screen resolution, the button may be out of sight. Please scroll to the right side if you cannot see the button.
- Select the columns you need to see in the main grid or remove the checkbox from the columns you do not need.
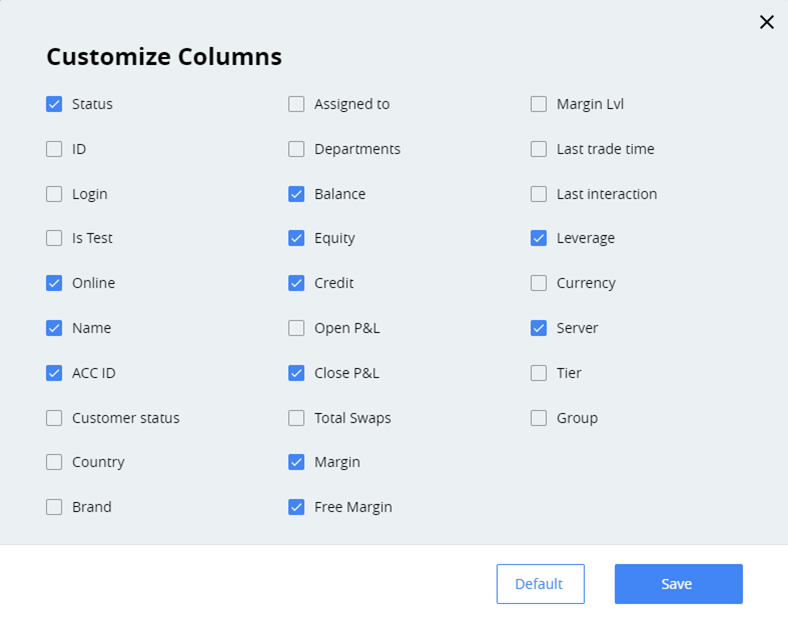
3. To reset the settings to default, click the Default button.
4. Click Save. As a result, you will see only the checked columns in the main grid.
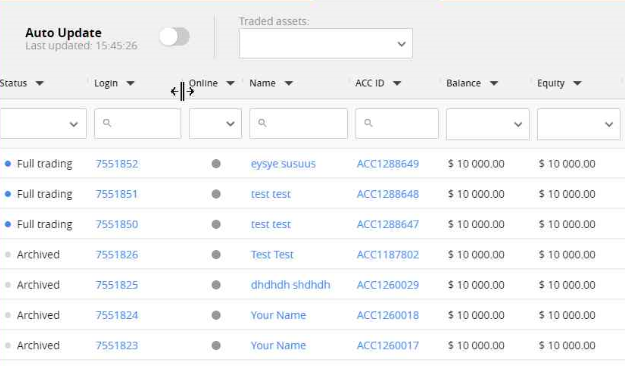
You may need to adjust the column width to see all the necessary data in the main grid.
To change the width of the column
Put the mouse cursor to the right of the column caption until it changes to Overview inline 2 , then drag the column to the right border.
Filter records in the grid
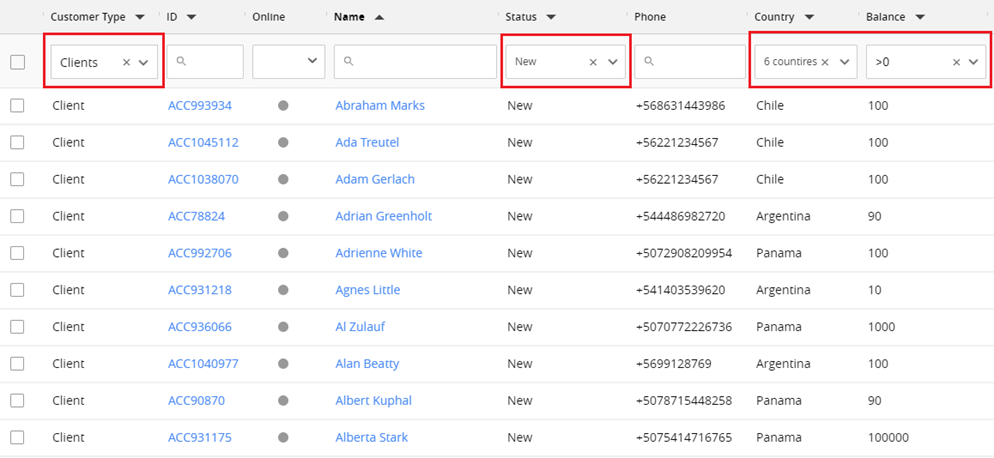
Use filters to display only the records with specific values in the column. The filtering area is located under the column captions.
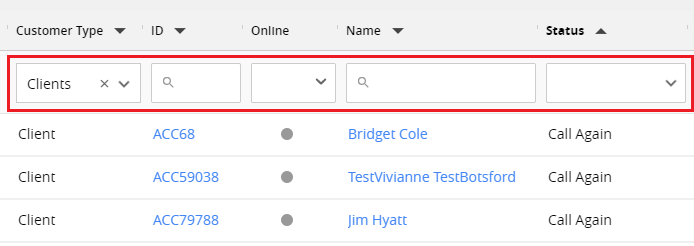
You can set one or more filters at the same time. If you select two or more filters, the main grid will display only the records matching all the specified conditions. For example, in the Customers section, you may filter all customers of Depositor type, from a specific country, and with a balance of more than 10000.
The filter will remain turned on in the section, even after switching between sections or logging out, until the moment you turn it off.
To apply the filter:
Click in the filter area and select the values. To apply the condition, press Enter on the keyboard or click outside the filter area.
To cancel the filter:
Click the Overview inline 3 button in the filter area.

Column types
When applying filters, you may notice different ways to enter the values. It depends on the column type.
Dropdown single-select
With this column type, you can select only one value from the dropdown list of the filter.

In some cases, there may be an option to select or exclude blank values.

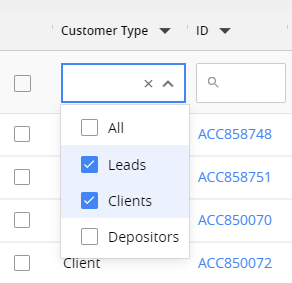
Dropdown Multi-select
In this case, you can select several values from the dropdown list.

In some cases, there may be an option to select and deselect all values, as well as blank values.

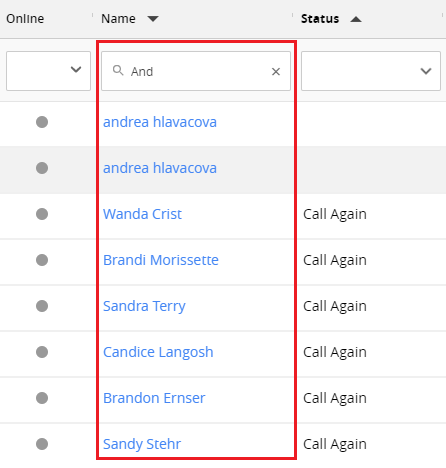
String
When there is a magnifier icon Overview inline 4 in the field, the value should be entered from the keyboard. The search is not case-sensitive.
In some cases, for example, to find customers by the name, you can type the part of the searched text and the system will display all matched records.
In other cases, you must enter the full value, for example, to find a customer by ID, phone number or Email.

When searching by the phone number, you can ignore the “+” sign. When searching by customer ID, you can ignore the “ACC” prefix.
Numeric
In numeric fields, you can use standard logical operators to find the records:
<Less then<=Less or equal>Greater then>=Greater or equal=Equal<>Not equal
Date&Time
When searching records by date/time, you can select one of three options:
- Select date range
- Exclude blank values
- Show only blank values
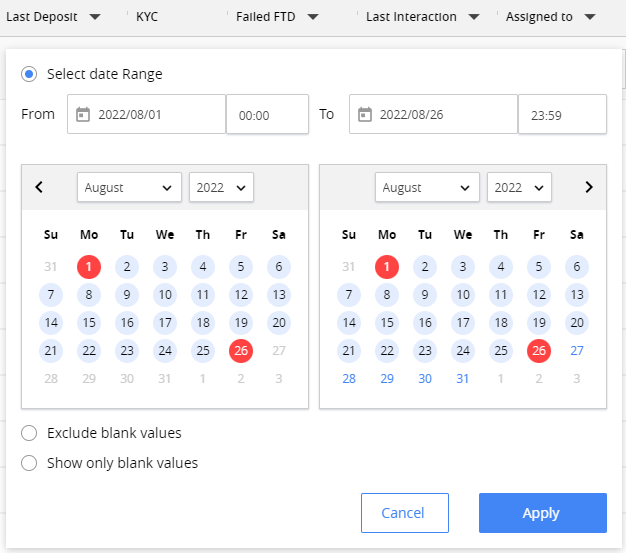
You can only select date range for auto-filled date/time fields as there are no blank values.
To select the date range, enter the start date on the left side and the end date on the right. You can type the value manually or tap it in the calendar.
Boolean
When filtering Boolean column type, for example, Online indicator in customer grid, you can select only one value: Yes/No, or On/Off.
