Regulation
Regulation is a CRM section in which you can set up customer trading permissions, limitations, and their interactions, ensuring all customer actions are legal in the region your brand is active.
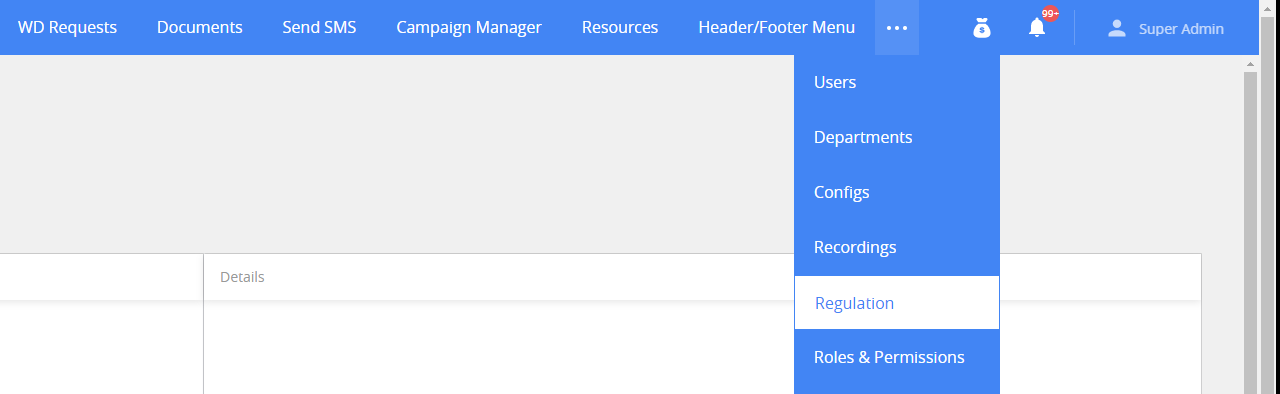
To open it, click Regulation in the tab bar or, if you can’t find it in the tab bar, click ![]() button and select Regulation in the menu.
button and select Regulation in the menu.
Permissions: Regulation > Access to Regulation.
Settings in Regulation are divided into two tabs: Regulations and Countries.
Regulations tab
On Regulation tab, you can adjust all settings for the specific financial regulator. For each regulation you have a settings, grouped into rules for easier access.
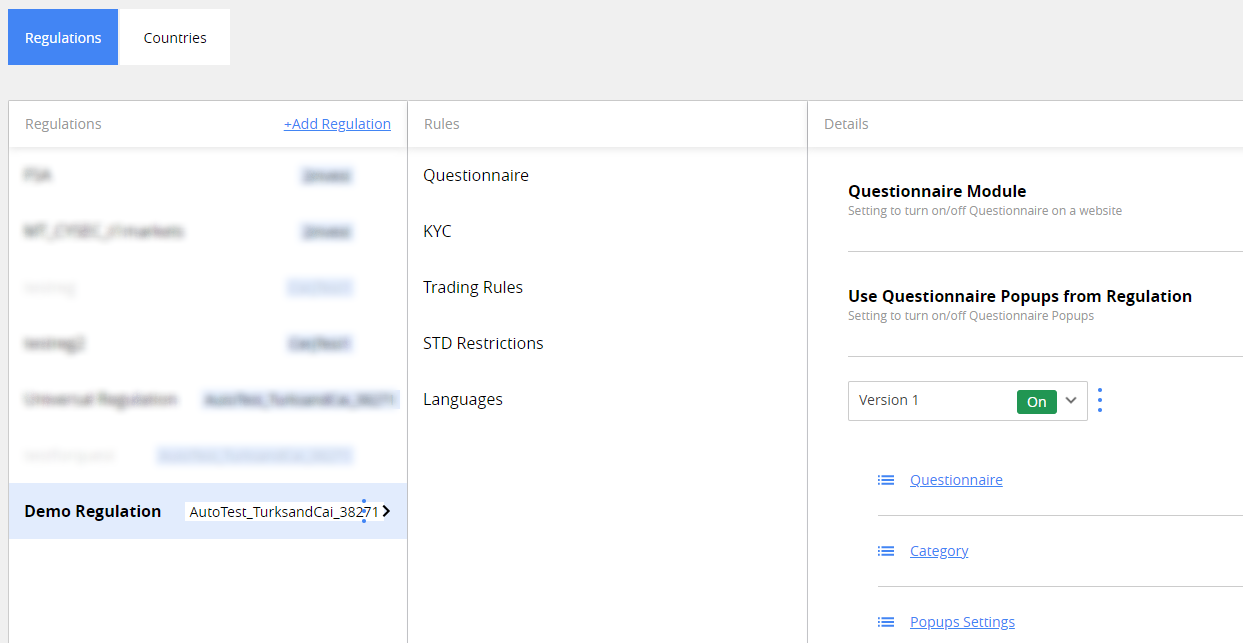
Settings on this tab are divided by columns, hierarchically ordered from left to right.
Select the setting you want to edit, following these steps:
- Regulation. Select the regulation you are making changes for.
- Rules. Select which trading rule for the regulation you have chosen on Step 1. See Regulation Settings for more details.
- Details. Edit the rule you have chosen on Step 2. This is where you set up a specific rule for the regulation.
Create and manage a regulation
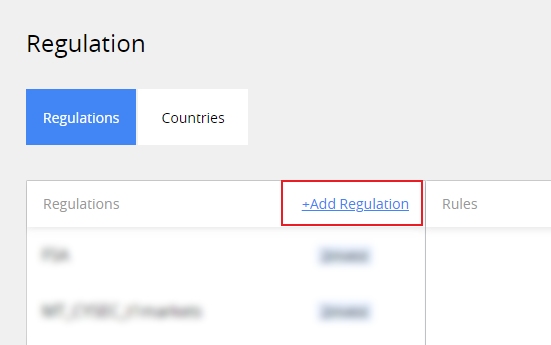
To create a new regulation, click +Add Regulation on Regulations column header in Regulations tab.
In the Add new regulation window enter the name of the regulation, and choose the brand it will be active for.

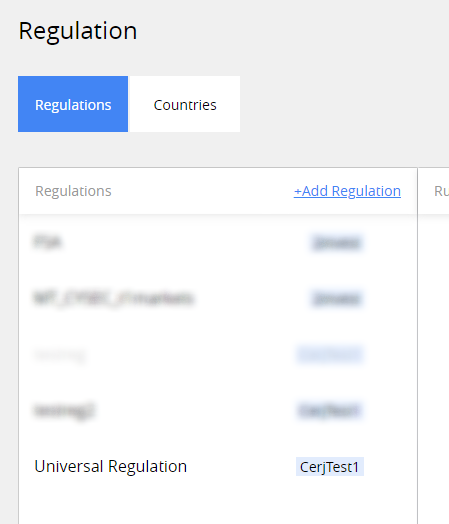
After you’re done, click Add button. You will see the regulation you’ve just added in the Regulations column.
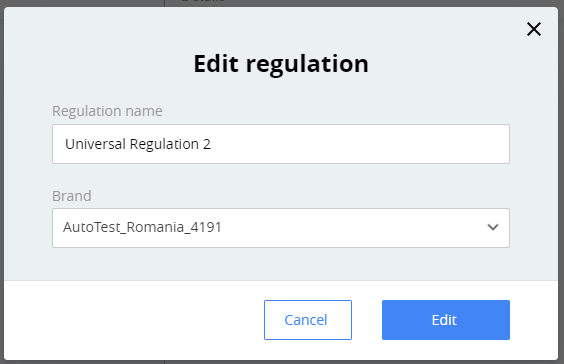
To edit the regulation’s name and attributes, click ![]() to the right of its name in regulations column, and choose Edit in the menu.
to the right of its name in regulations column, and choose Edit in the menu.

In Edit regulation window, you can update regulation’s name and the brand. After you’re finished, click Done to update the regulation. You will be able to see the updated regulation in Regulations column.
Even if you’ve already created a regulation, it won’t work until you select the countries for which the regulation is active. See Countries for more information.
Note*. We suggest that you first finalize regulation setting (e.g. add questionnaire in all needed languages, define KYC and Trading rules, etc. ), before adding countries to it. Doing this will avoid possible problems with customer accounts, in case you need to make updates to the active regulation settings after customers have already met the requirements for their existing version.*

Click Save to apply the updated settings.
To add an additional regulation for the country, click +Add Regulation under Additional Regulations in Countries tab for the country. If the country has more than one regulation, customers from it will be able to choose it during their onboarding.
Note. To minimize issues, you can’t leave the default regulation field for the country blank. Once it has been assigned to any regulation, you can only change it.
There is no possibility to delete the regulation. Instead, you can deactivate it – all the regulation�’s settings will be saved, and you will be able to reverse it in case you need to. You can only deactivate the regulation with no countries associated with it – in case there are some, you can select other regulation for them in Countries tab. Filter countries list using the tools at the top of country list column to make the process easier.
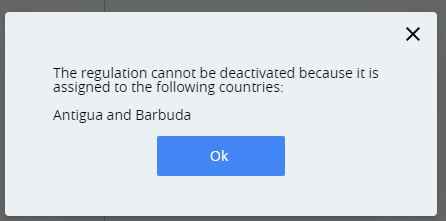
In case the regulation has at least one country associated with it, when you will try to deactivate it, you will see a window stating it, and the regulation will stay activated.
To deactivate the regulation, click on three dots to the right of its name in regulations column and choose Deactivate in the menu.

The regulation will be deactivated without confimation and its entry will become greyed out.
To reactivate the regulation, click on three dots to the right of its name in regulations column and choose Activate in the menu.

Note. While the regulation is deactivated, you can assign countries to it without the need of activation.
Questionnaire
Questionnaire is one of the cornerstones of the KYC process; it is a set of questions for the customer, answers to which will help to understand more about the customer - whether the customer is eligible for trading, whether the risk of trading for them is higher, etc.
To access questionnaire settings within a regulation, select the regulation , and then click Questionnaire in Rules section next to it.
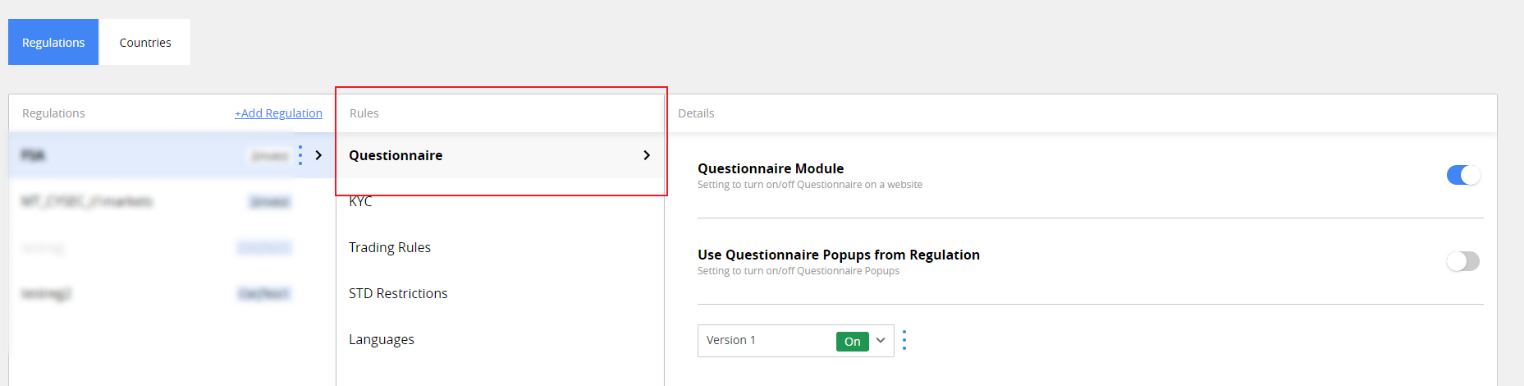
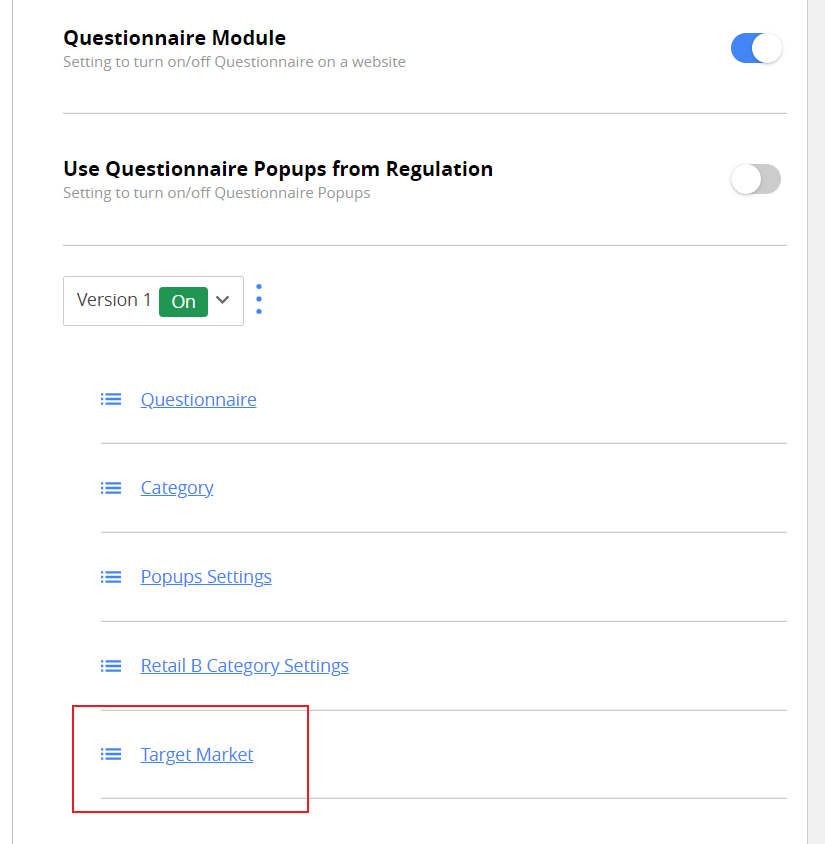
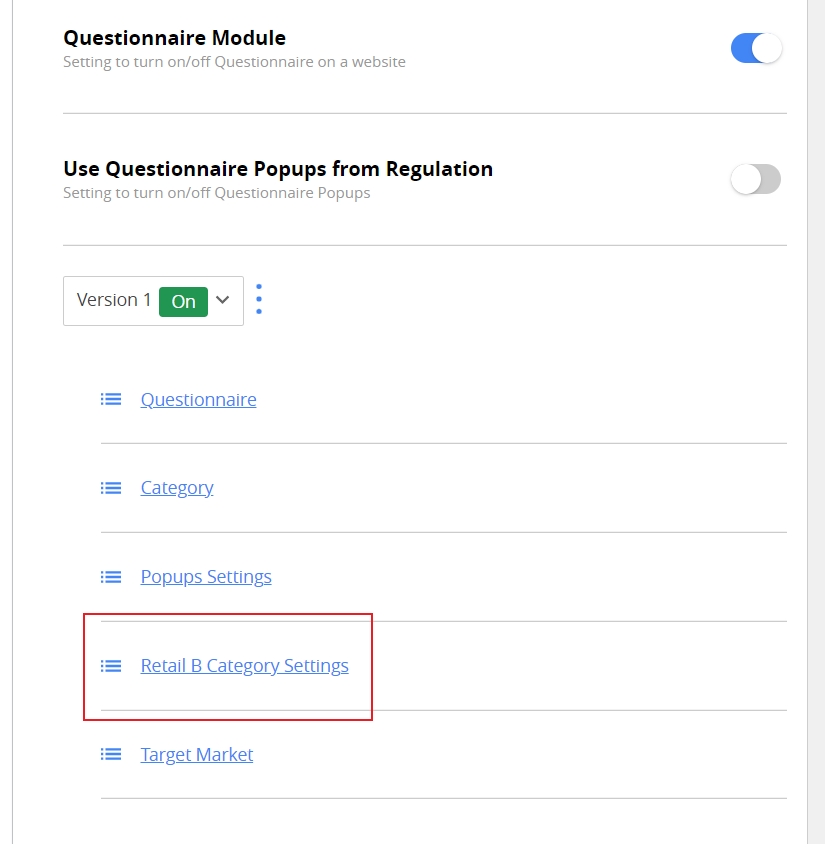
When you select Questionnaire, in Details section, you can set up:
- Questionnaire Module. Toggle if the questionnaire is active for the regulation.
- Use Questionnaire Popups from Regulation. Toggle risk warning popups for the questionnaire.
- Questionnaire version dropdown. Add new or switch between existing questionnaire versions to edit them.
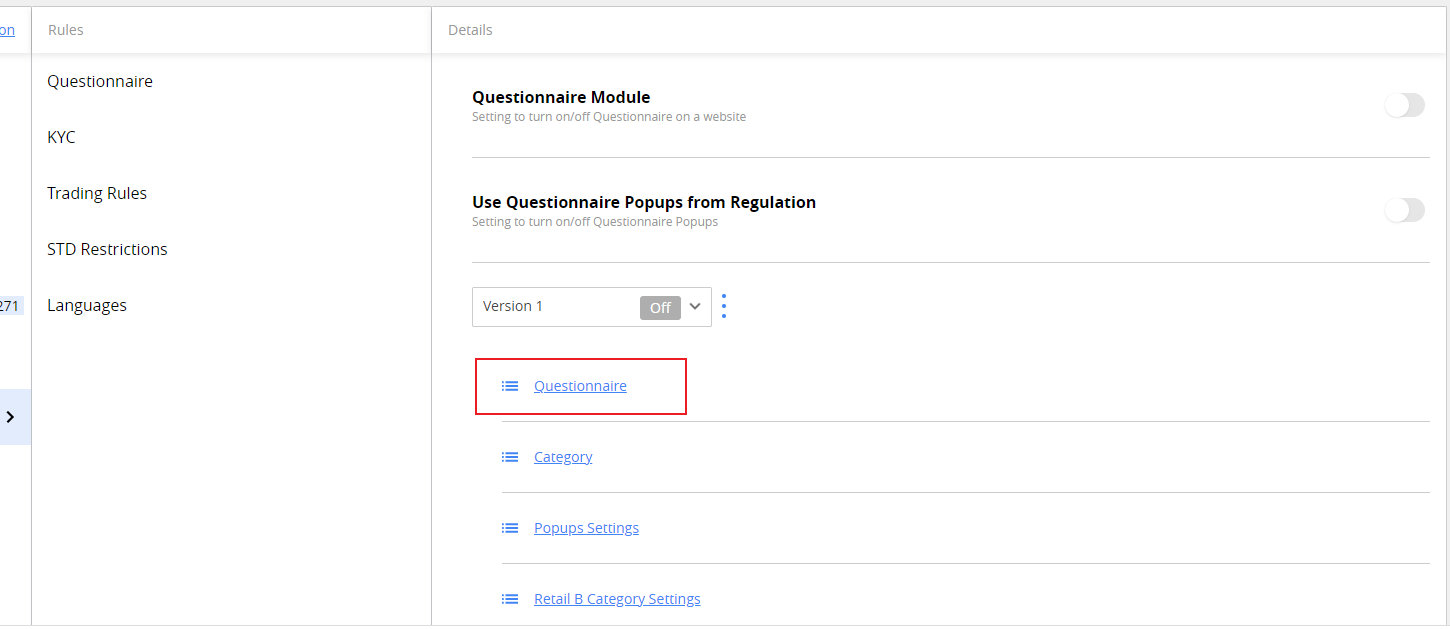
- Questionnaire. Create a questionnaire for the regulations.
- Category. Set how to group customers based on how they answer the questionnaire.
- Popups Settings. Set what the customers will see on the popups and what are the conditions for them to appear.
- Retail B Category Settings. Set the additional conditions the customers need to meet to be categorized as Retail B.
- Target market. Group customers by their Risk Tolerance qualification and set risk score thresholds for each group.
Create a questionnaire for the regulation
To create a questionnaire for the regulation, we suggest you to start with adding the questions to it. You don’t need to enable Questionnaire module or Questionnaire version to do that.
Note*. To minimize possible issues for the customers under the regulation, we highly recommend that you enable questionnaire functionality only after completing it up and localizing it for every country where the regulation is active.*
To create a questionnaire and start adding questions to it:
- Click on Questionnaire section in Questionnaire Details of selected regulation.
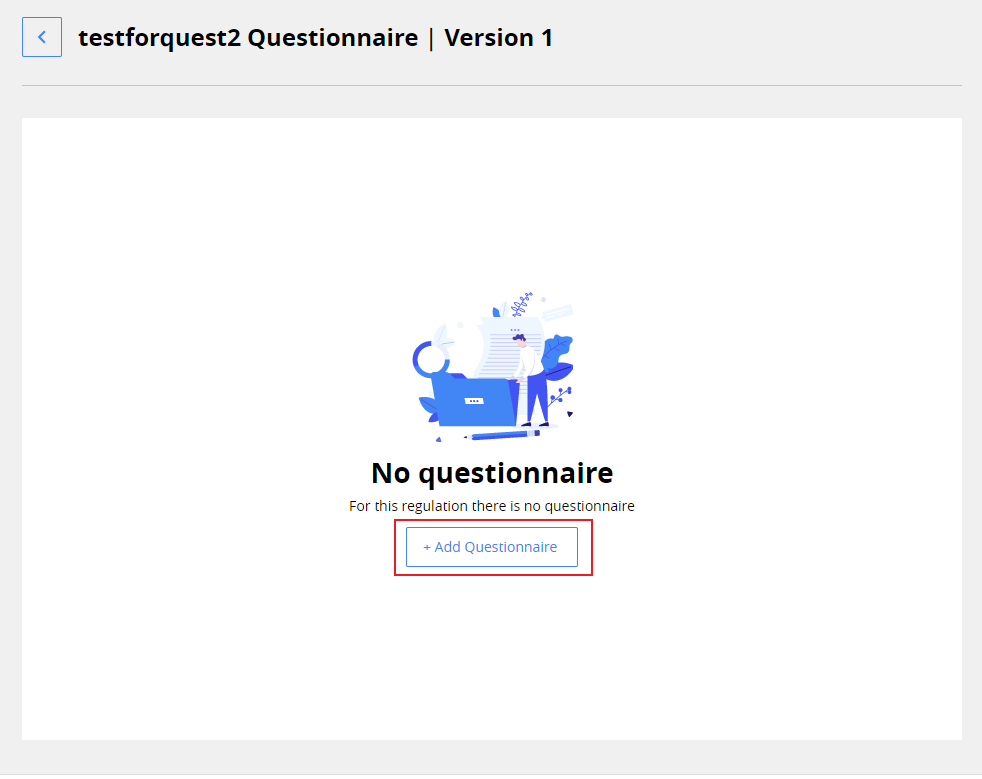
- Click +Add Questionnaire in the page that will open.
Doing it will open a questionnaire editing page, where you can:
- Create question groups, called pages.
- Create question sets within these groups.
- Add different types of answer options for each question.
- Assign scores for certain answers.
- Add special atributes for certain answers e.g. block customer for choosing certain answer, allow them to trade as a professional, etc.
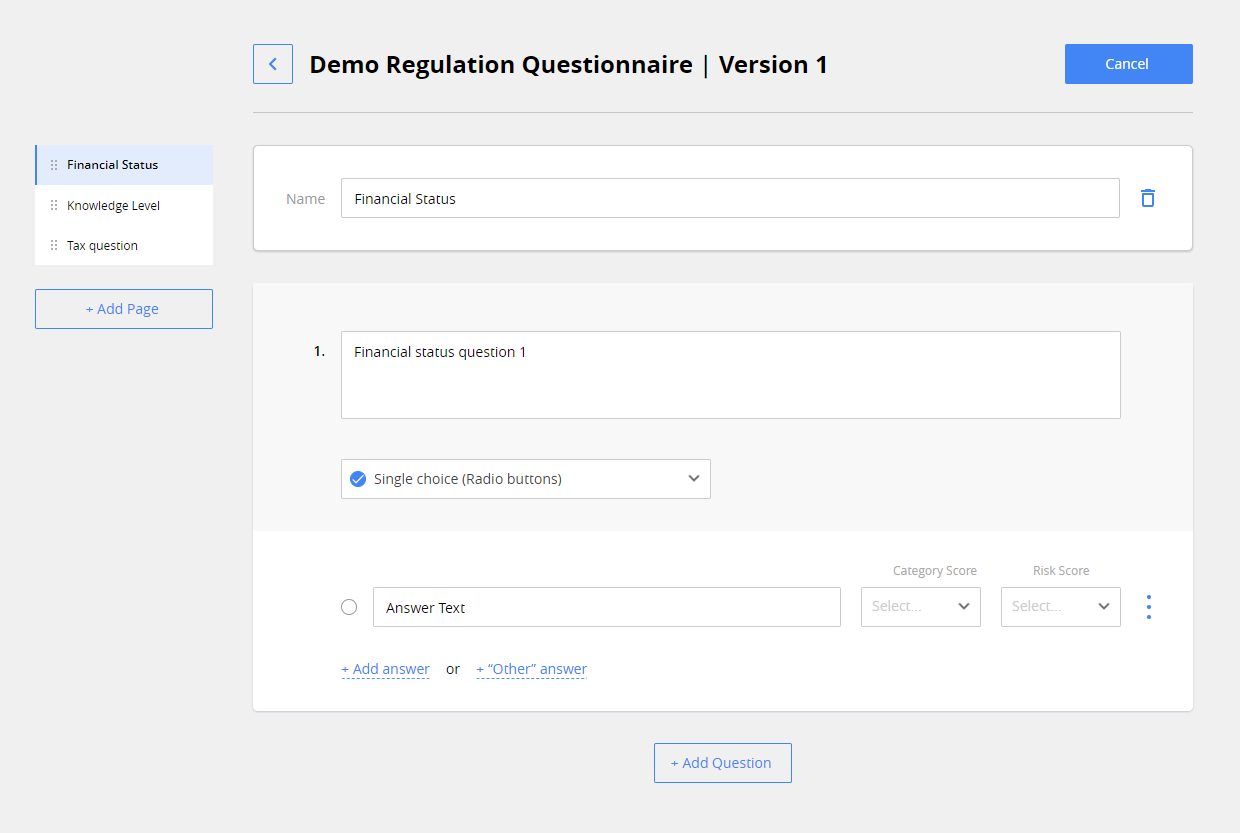
On the left side you can see the list of pages. Use pages to group the questions in your questionnaire, for example one page is dedicated for customer’s financial status, the other – for checking his trading knowledge, etc. To add a page to your questionnaire, click +Add Page button.
Note. The name for the question page must be unique

After you add a question page and select it from the list, you can edit it at the main page area to the right of the list.
Top area has a section with a text field for the page name and ![]() icon.
icon.
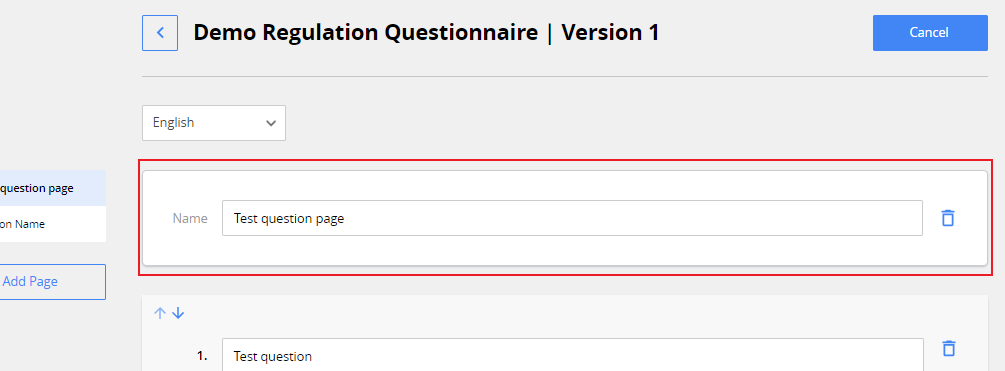
To edit page name:
-
Type in the new name in the text field.
-
Click Save & Publish button at the top right.
Note. The page name should be unique for the questionnaire.
To delete a page:
- Click
 icon to the right of the page name.
 - Click Save & Publish button at the top right.
Note. This action will also delete all the questions in the page.
Below the page name section is where you add the questions to it. Once you create a question page, one question is already added in it.
 To add a new question to the question page, click +Add Question button under the question section.
Each question section has such elements, described top to bottom:
-
Text field. Add the text of your question here.
Note. Question text must be unique for the questionnaire, not only for the question page.
-
Question type. Choose which kind of question it will be.
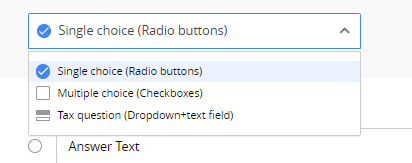
Your questionnaire can have such question types:
- Single choice (Radio buttons). Customer can select only one answer.
- Multiple choice (Checkboxes). Customer can select one or more answers.
- Tax Question (Dropdown + text field). Customer needs to select their country from the list and enter their Tax identification number (TIN). Check Tin Number Required if needed.
- Answers Section. Add answer options to the question and adjust their attributes.
Note. Answer text input fields are not scaling to fit lengthy answers, so be sure to double-check if the text you’re adding is correct, especially when copying and pasting them from the document to the questionnaire.
Besides adding an answer text you can choose:
- Category Score. Define how much Category scoring points customer gets if they choose this answer. Is zero by default. See Categories for more information.
- Risk Score. Define how much Risk tolerance points customer gets if they choose this answer. Is zero by default. See Target Market for more information.
- Additional answer attribute. Assign special status to the answer, e.g. customer will get blocked if they choose it, an answer will indicate they are professional traders, etc. To access the list, click
 to the right of the answer text. See Answer attributes for more info.
To add an answer option to the question, click +Add answer at the bottom.
Note. Answer texts must be unique within one question.
Other answer option enables customer to give a custom answer to the question, if it’s needed.
To add “Other” answer option , click +Other answer at the bottom. If question has “other” option, customer will se a text field they can fill if they choose this option.
To reorder answers for the question, drag-and-drop them by the ![]() icon to the left of answer’s text field.
icon to the left of answer’s text field.
Once you have added two or more questions to the page, you can delete and reorder them.
To delete a question:
- Click
 icon to the right of the question’s text field.

- Click Save & Publish button at the top right.
To rearrange questions:
- Use
 buttons at the top left corner, until you’re satisfied with the order of questions.
 - Click Save & Publish button at the top right.
Note. Remember to click Save & Publish button to save any changes to the questionnaire. Changes are not saved automatically.
Categories
Use categories settings for the questionnaire to group customers by their questionnaire outcomes.
To access categories settings, click the Category text in Regulation rules details.

You will see the list of all possible categories for the questionnaire, you can toggle each of them individually.
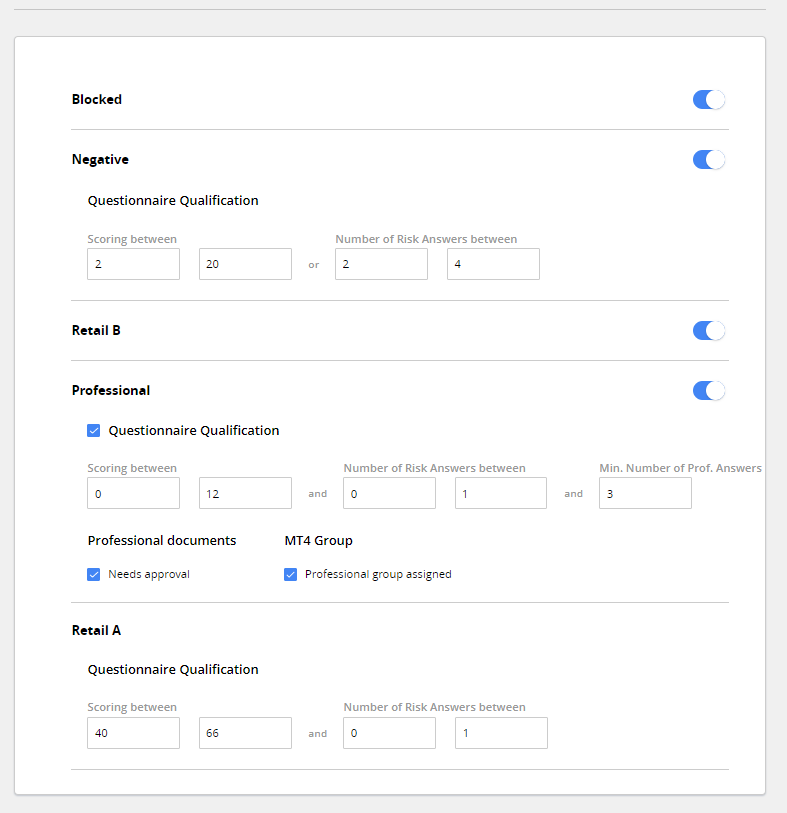
Categories which can be set up are:
- Blocked. Used to prevent certain customers to trade, in the stage of them answering the questionnaire. Answers with “marked as blocked” attribute are used.
- Negative. Used to identify the customers with low level of trading knowledge and high risk of losing money while trading. You can set up lower and upper limits of score or the number of answers with “Marked as Risk Tolerance” for customer to have to be considered negative.
- Retail B. Used to identify the customers with a subpar level of trading knowledge, who need to be warned about the risks more than Retail A. If this category is enabled, you can set up the criteria for it in Retail B Category settings.
- Professional. Used to identify customers who trade on a full time basis and works in finance.
You can set up:
- Score limits and certain answers.
- Questionnaire completion requirement for customer to be considered professional.
- Required Approval of professional documents for the customer.
- Requirement to be assigned to MT4 professional group for the customer.
- Retail A. Used to identify the customers with high level of trading knowledge and lower risk of losing money while trading. You can set up lower and upper limits of score OR the number of answers with “Marked as Risk Tolerance” for customer to have to be considered Retail A.
Target Market
Use the settings in Target market, to group customers by their Risk Tolerance qualification, which can be:
- Negative
- Neutral
- Positive.
Risk Qualification points can be applied to answers in the questionnaire along with category score points.

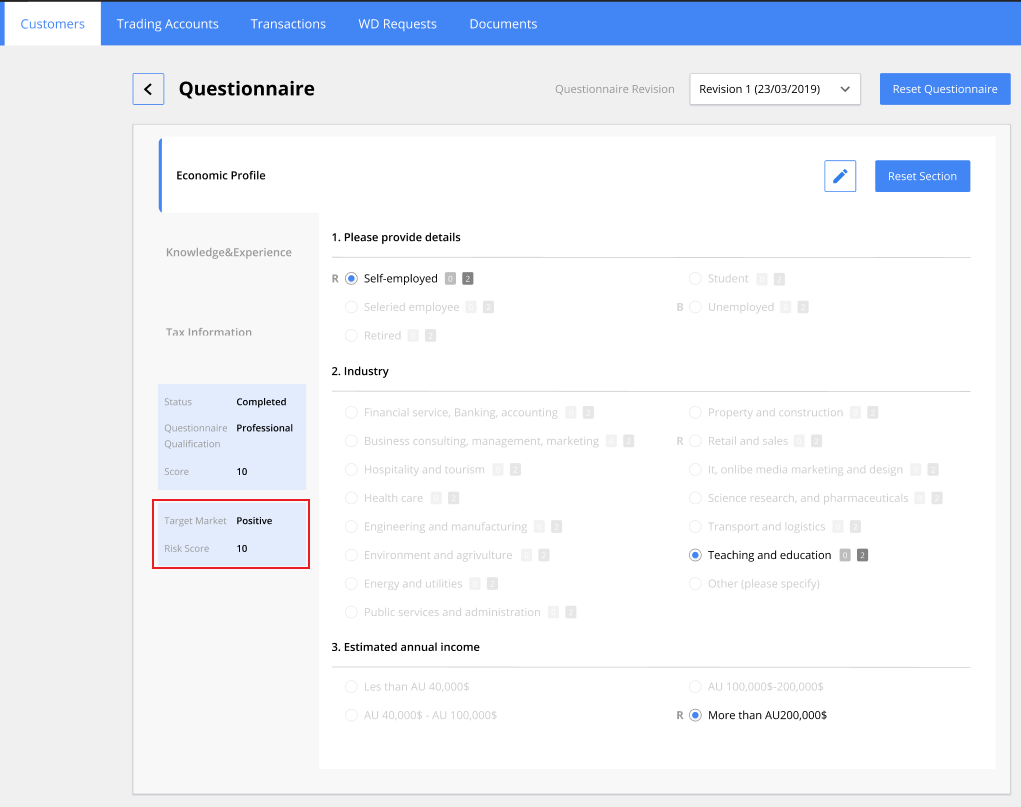
View Target market category and score for the customer in their Customer Card. Target market score and category are calculated for each questionnaire version.
To access Target market settings, click Target Market text in Regulation rules details.
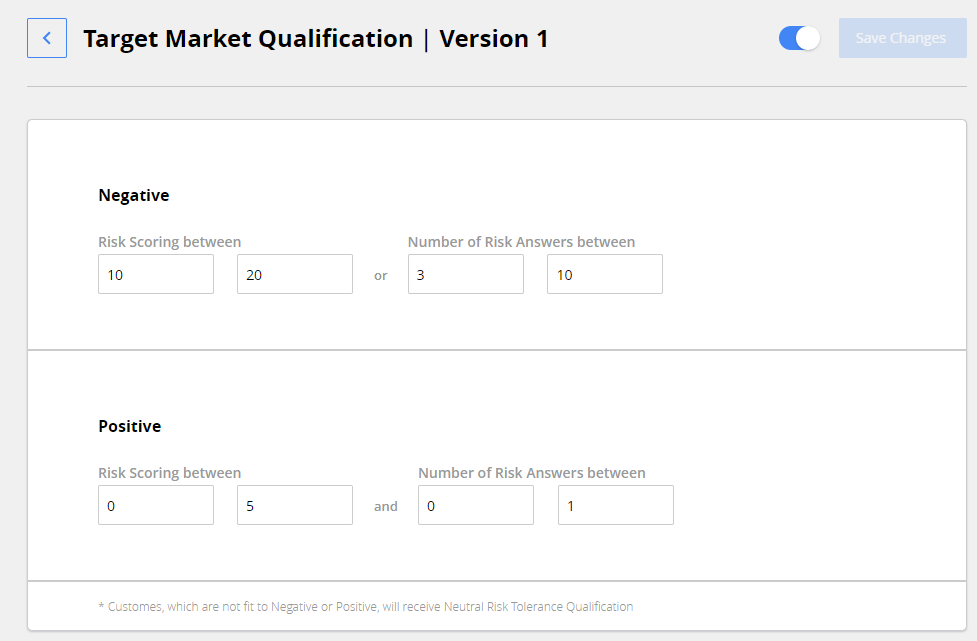
In the window that will open you can toggle the feature in the top right corner, and set up:
- Lower and upper limits for risk scoring or the number of Risk Answers for Negative group.
- Lower and upper limits for risk scoring and the number of Risk Answers for Positive group.
Customers that don’t fit into that criteria are assigned with Neutral risk tolerance.
After you are done with setting the feature up, click Save Changes.
Popups settings
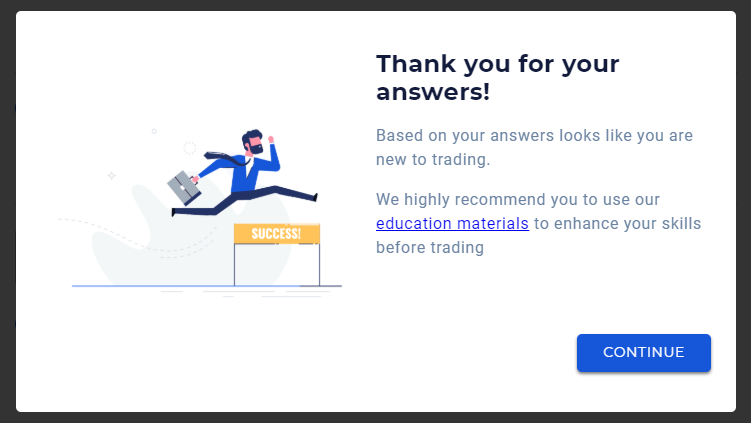
Popups are a way to additionally inform different categories of customers after they finish the questionnaire and require them to confirm that they are acknowledged with it, before they can move on. It can be used to confirm that higher risk categories of customers are warned about the risks of trading, and confirm they are aware about them, which can be requirement by a regulator.
If customers fall under popup display criteria, they will see it after completing the questionnaire.
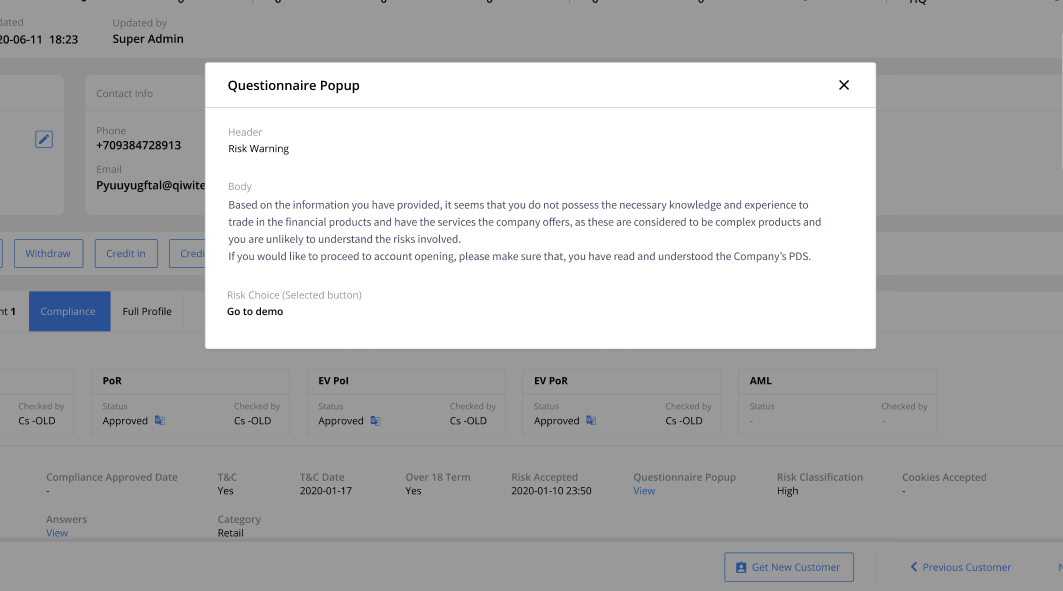
If the customer agrees with the popup warning, CRM user can see it in their customer card
To set up the popups, click Popup settings text in Regulation rules details.

In the page that will open, you will see the list of the categories on the right side. You can toggle popups for each category individually.
Choose the category to start editing the popup for it. Toggle whether the popup is active with the switch at the top right.
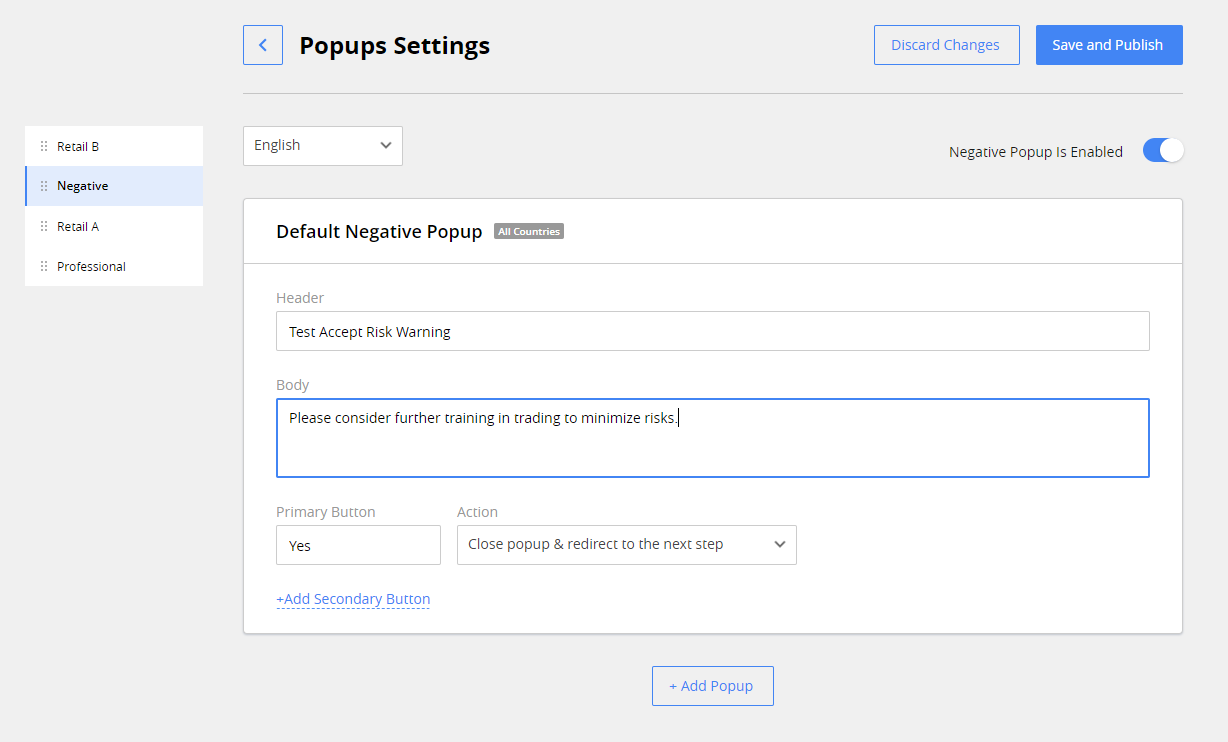
You can edit the following settings for each popup:
- Header. Title of the popup.
- Body. Main text within the popup.
- Primary button. Text of the button.
- Action. The action that will happen after customer clicks the button. Can be:
- Close popup & redirect to the next step.
- Close popup & redirect to URL.Write the link in this field in the same way you would in your browser’s address bar.
- Add secondary button. Add another button to the popup. Settings available are the same as for the primary button.
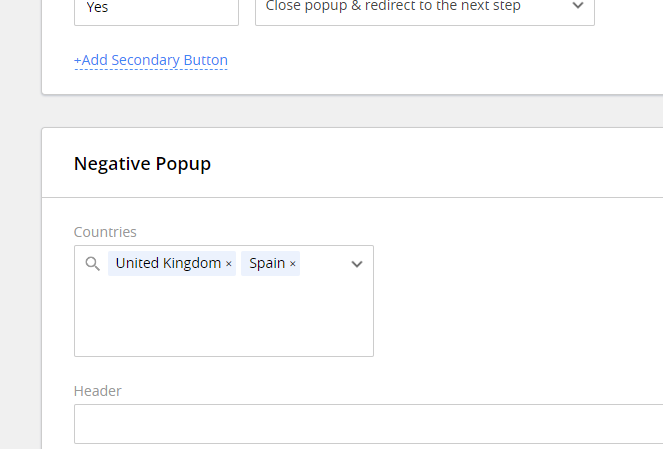
You can create more than one popup for the category, specific to one or more countries. In that case the first popup you have created will be shown as a default one. To do that:
-
Сlick +Add popup button below the popup edit fields.
-
Select which countries’ customers will see it, by adding one or more countries in Countries field.
To delete additional popup, click ![]() button at the top right of the additional popup settings area. The first popup can’t be deleted – If you don’t want customers to see it, disable popups for the category using the switch in the upper right of the popup editing area.
button at the top right of the additional popup settings area. The first popup can’t be deleted – If you don’t want customers to see it, disable popups for the category using the switch in the upper right of the popup editing area.

When you’re done setting popups, click Save & Publish at the top right**.**
Retail B Category Settings
You can set up additional warning messages, that certain customers from Retail B category will see after completing the questionnaire.
To set up the conditions to display risk warning message, click Retail B Category Settings text in Regulation rules details.
Set up the conditions when the customers will see the warning message. You can use complex logic to fine-tune the selection of customers.
Click +Add Settings to set up Risk setings for the regulation.
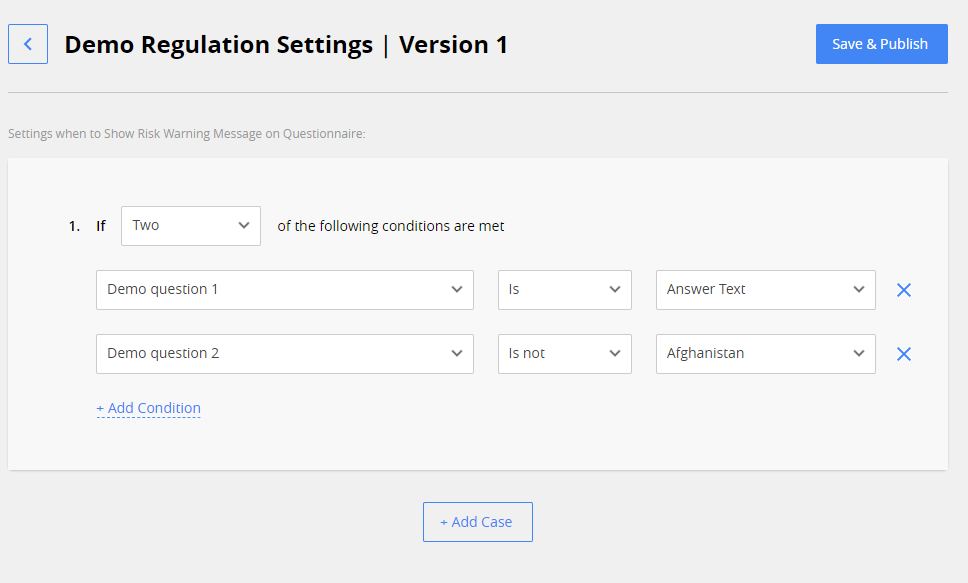
To create more than one case for the warning message, click +Add Case below the case edit area, and set it up as usual.
For one case you can set up:
- How many of the conditions you mentioned should be met. Available values are: two, three, any, and all.
- Which answers for which specific questions comply with the condition.
After you’re done setting the cases up, click Save & Publish.
Add a new Questionnaire version
Different reasons, like changes to the regulation, or need for a certain customer to retake a questionnaire after reset, can require making a new version of the questionnaire.
To add a new version of questionnaire, click ![]() to the right of the questionnaire version menu, and click Add New Version.
to the right of the questionnaire version menu, and click Add New Version.

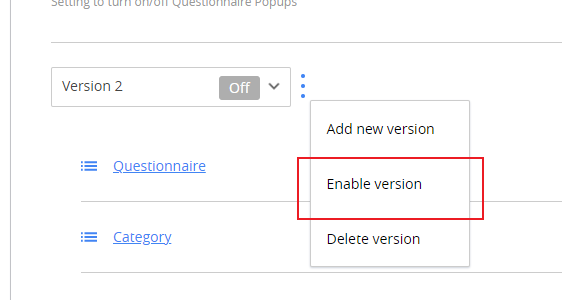
The new questionnaire version is disabled by default. To be able to choose the new questionnaire version for the customer, you need to enable it. To do this:
- Choose the version from the version menu.

- Click
 to the right and select Enable version from the menu.
All the settings from the first version of the questionnaire will be copied to the new version. To edit them for the new version, choose the version from the menu, and edit it as you need.
Questionnaire localization
One regulation is usually actual for more than one country. To make the verification process more transparent for all the customers under the regulation, verification steps should be localized to customers’ languages. This is especially true for the questionnaire,since customers need to clearly understand the questions to answer them correctly.
You can localize the questionnaire for all the regulation’s languages you’ve selected in Language rules of the regulation. To do that:
- Go to your regulation’s questionnaire and click Edit button at the top right.
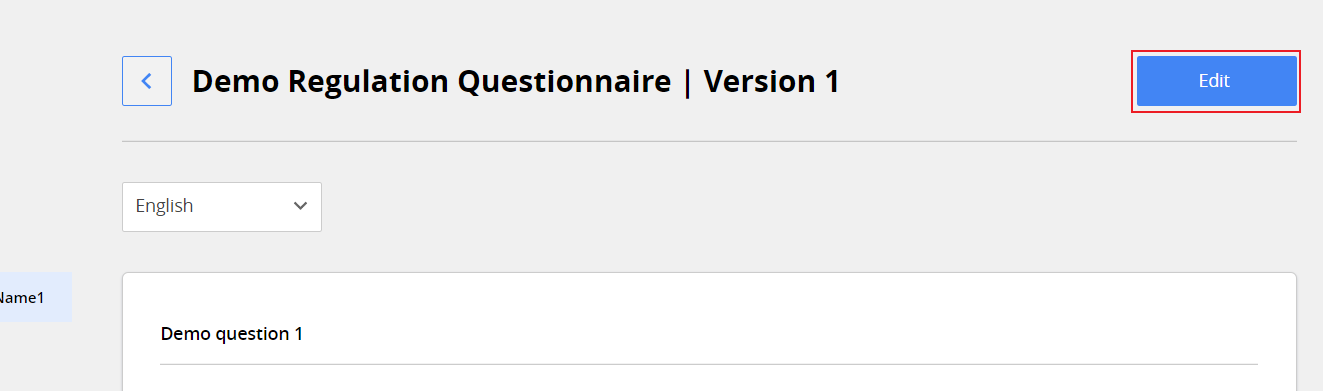
- Select the language from the list at the top of the page.
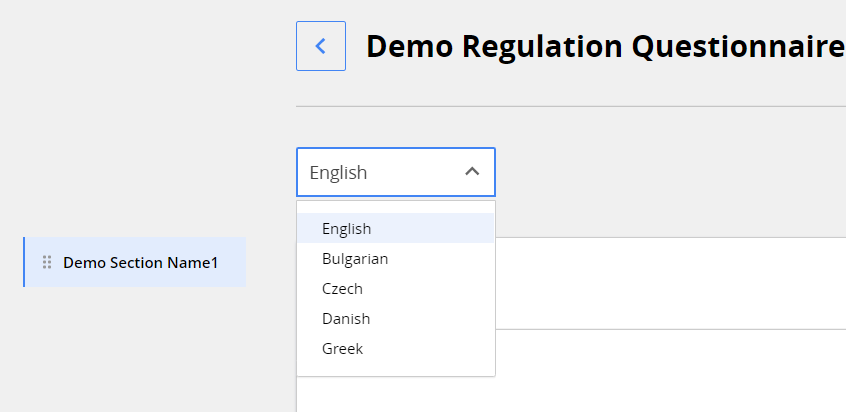
- Overwrite questionnaire text content in selected language.
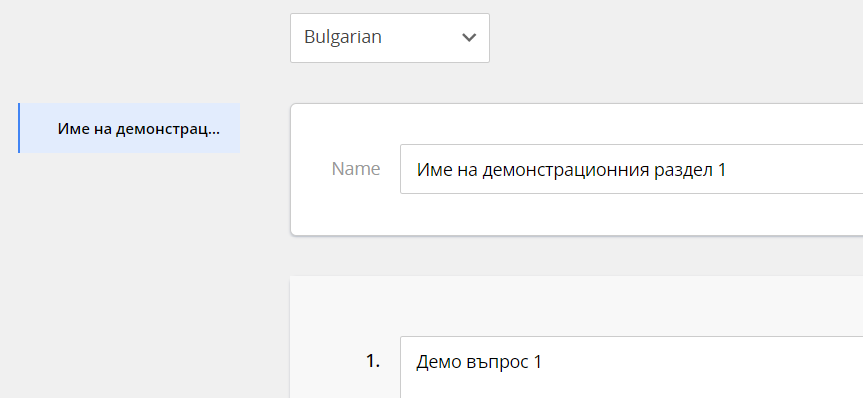
- When finished, Click Save & Publish button at the top right.
Note*. If you haven’t localized questionnaire for one of the languages of the regulation, customers with this language will see the questionnaire in English.*
KYC
Know Your Customer (KYC) is a procedure of customer identity verification aimed to confirm customer's identity and residence and the legit origin of the money they deposit on their trading account.
Use KYC settings to give customers trading permissions by their KYC progress.
To access KYC settings within a regulation, select the regulation, and then click KYC in Rules section next to it.

When you select KYC in Rules, in the Details section, you will see three columns:
- Approved
- Partially Approved
- Initially Approved
Each column is dedicated to the corresponding customer status settings. Only Approved customer status type is required. Other statuses are optional.
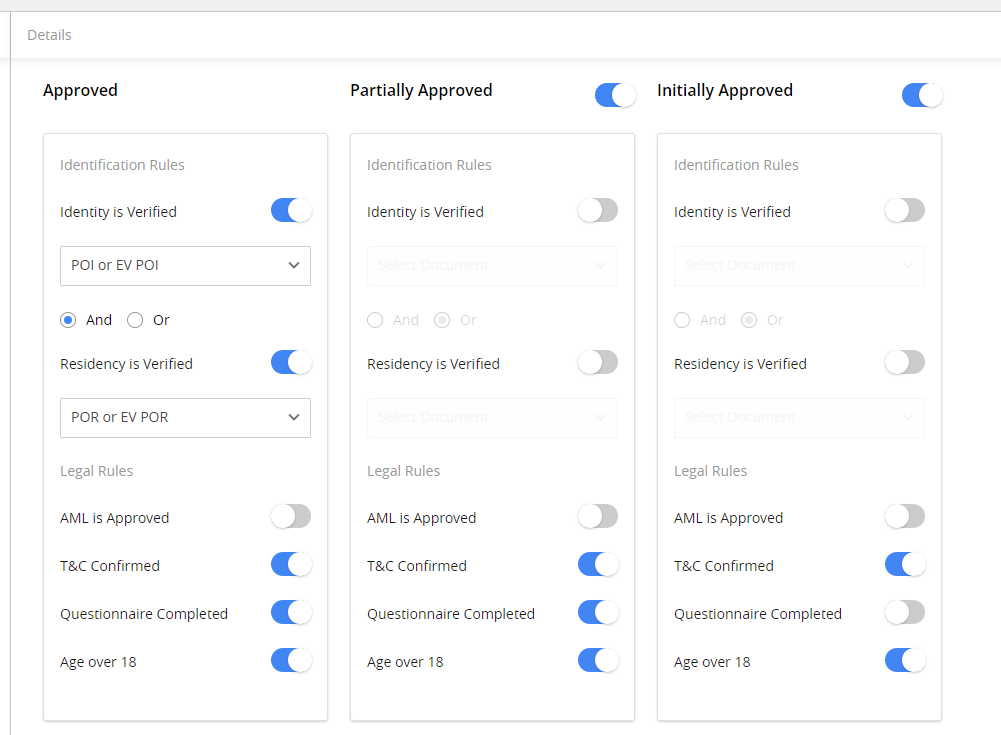
You can set the following rules for active customer statuses:
- Identification rules. Set up if the customer needs to confirm their identity and/or residency, and which types of documents you accept as proof.
- Legal Rules. Set up if the customer needs to:
- Pass Anti Money Laundering (AML) check.
- Confirm Terms and Conditions (T&C).
- Complete the questionnaire for the regulation successfully.
- Confirm they are 18 or older.
The list of rules you can set up are the same for every customer status type. After you’re done, click the Save button at the top right .
After you’ve set up KYC details, you can set how the opening, verification, and closing of Trading Accounts will work for each active customer status. See more:Trading Rules
Trading Rules
Trading Rules specify the limitations which apply to customer trading accounts depending on their KYC status.
Use Trading Rules setting to set up permissions for customer’s trading account on every stage of the KYC approval, so their activity always stays within the regulatory restrictions.
To access Trading Rules settings within a regulation, select the regulation and then click Trading Rules in Rules section next to it.
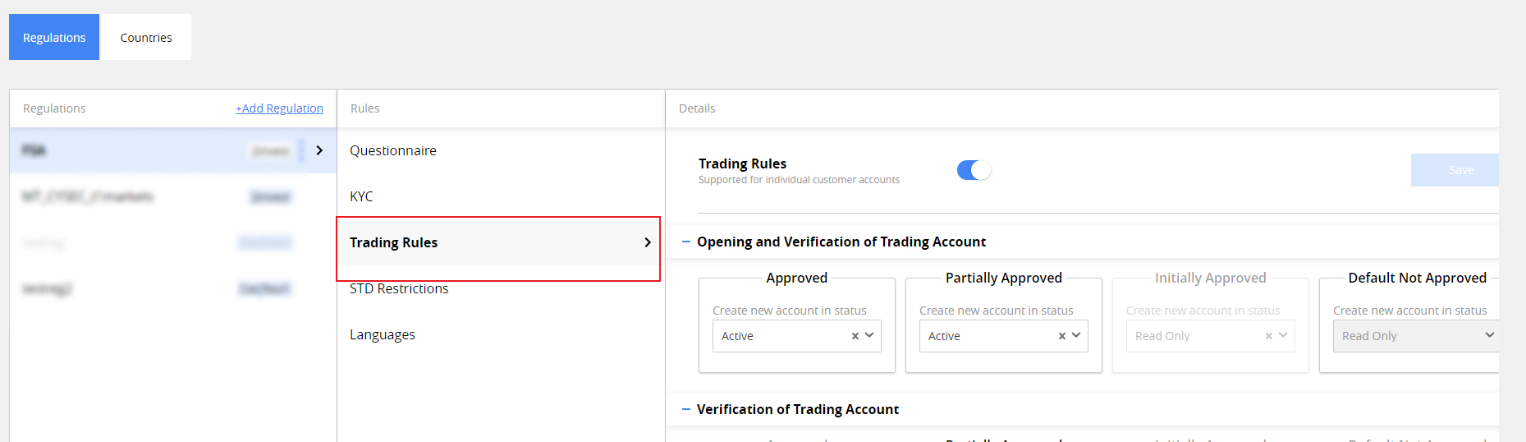
Use Trading rules switch to toggle if the Trading rules are active for the regulation.
Note. Initially approved and Default not approved customer statuses settings are pre set, and can’t be edited.
Settings for Trading Rules are grouped into sets for:
- Opening and Verification of Trading account. Select, which status will the new trading account opened by customer have, depending on their KYC status.

- Verification of Trading Account. Select, if you want to have a time limit on how long can customers have the TA open before fully completing KYC and getting Approved status and its duration, if it’s enabled. You can choose a T&C confirming date or the date of FTD as a starting date for the countdown. In case the time limit is exceeded, customer TA is closed with the Duration Limit Met reason.

-
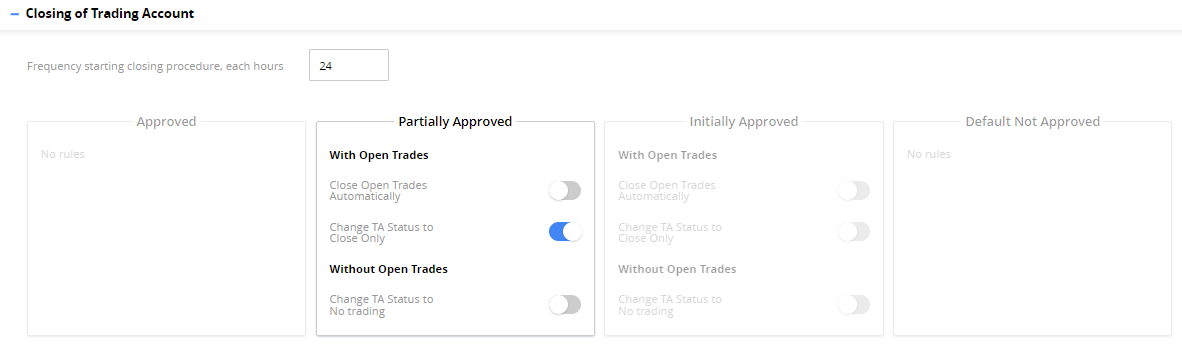
Closing of Trading Accounts. Set how should the automatic TA close for selected customer statuses, if they have exceeded the verification duration limit. Select the frequency of closing procedure initiation in the field above. Use the corresponding switches to set the desired behavior of customer’s TA.
Note*. If you have Verification of the Trading account rule set for a certain customer status, you need to* have at least one toggle enabled.
After you’re done, click the Save button at the top right corner.
STD Restrictions
Second-time deposit (STD) Restrictions settings control whether the customer can make a STD without completely passing the KYC approval procedure. This rule can be applied as a default rule for the entire regulation or as a custom rule you can use per:
- Country. For example, the restriction works only for France.
- Campaign. For example, the restriction works only for precious metals campaign.
- Country & Campaign. For example, the restriction works only for the precious metals campaign in France.
Use STD Restrictions settings within the regulation to set up default and custom rules by which customers can make STD on their trading accounts.
To access STD Restrictions settings within a regulation, select the regulation, and then click STD Restrictions in the Rules section next to it.
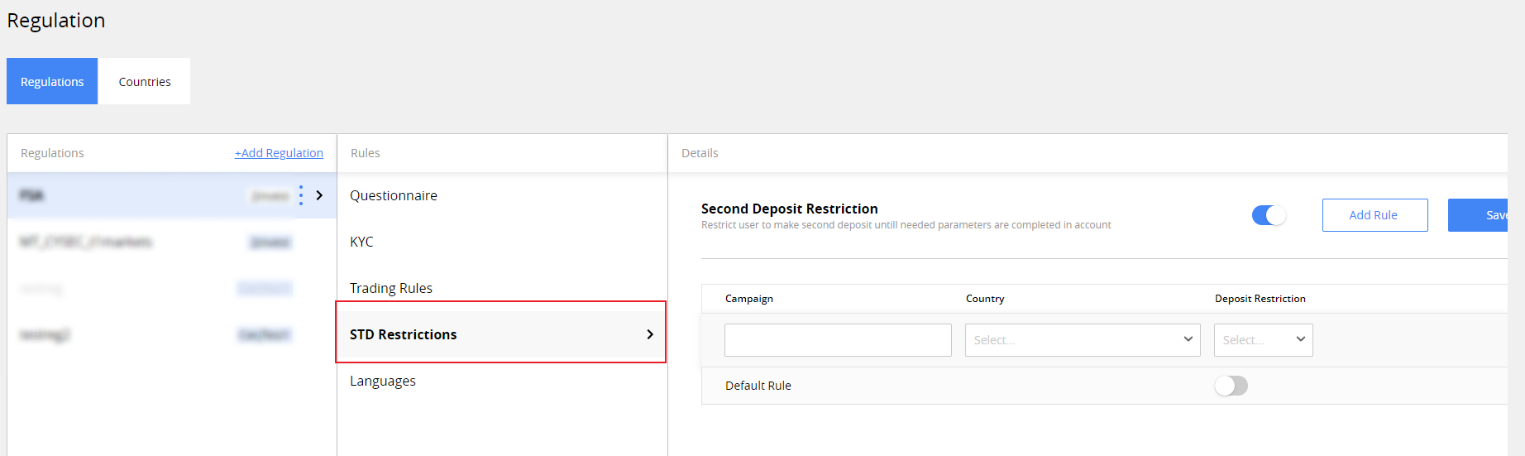
Use the switch at the top of the settings area to toggle STD restriction logic within the regulation.
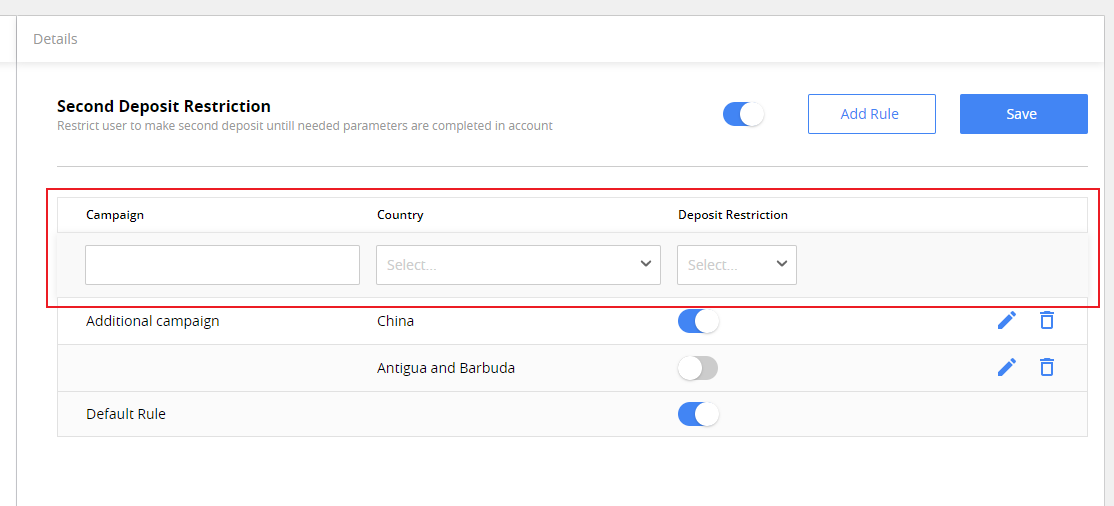
To set up the default STD restriction rule, which will be applied to all the cases, if they are not covered by custom rules, use the Default rule in the settings area.
To set up custom restriction rule per campaign and/or country, click Add rule button at the top right of settings area.
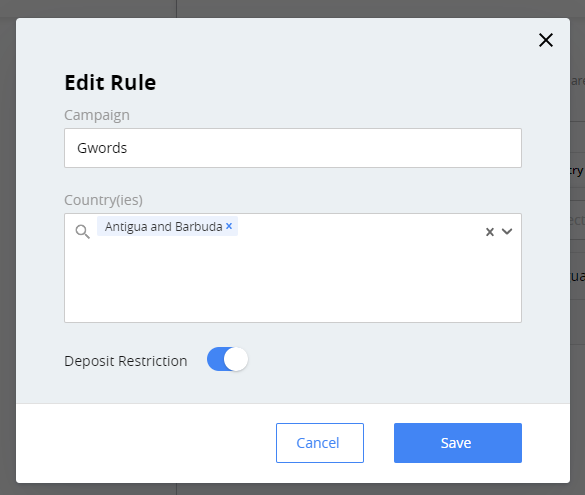
In Edit Rule window, that will open, set up:
- Campaign. Enter the name of the campaign you want to set up the rule for. If you have multiple similarly named campaigns, and want to apply the rule for them all at once, enter the start of the campaign name, common for them. Optional.
- Country(ies). Choose one or more countries this rule will be active for. You can choose only the countries, where the regulation is active. Optional.
- Deposit Restriction. Toggle, if STD restriction will be applied to to the selection you have made in the two fields above.
After you’re done, click the Save button at the bottom right corner.
All the custom rules created for the regulation are listed at the main settings area. Use the fields at the top of the list to narrow down the selection.
To edit the existing custom rule, click ![]() to the right of the rule.
to the right of the rule.
To remove the custom rule, click ![]() to the right of the rule.
to the right of the rule.
Languages
KYC procedure for the regulation must be localized to be well understood for every customer who needs to go through it.
Use the Languages section for the regulation to set up which languages must be supported. You can add other languages for the questionnaires of the regulations only from the languages selected in this section.
To access Languages settings within a regulation, select the regulation, and then click Languages in Rules section next to it.
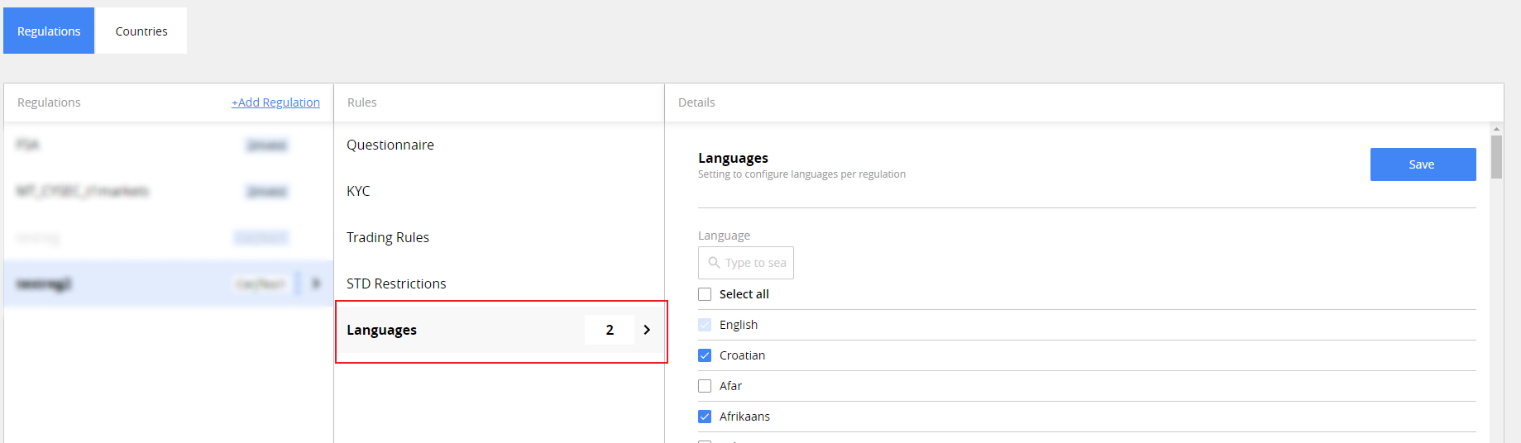
To choose the languages for the regulation, use the checkboxes. Use the search field above the language list to find the languages you need.
After you’re done, click Save button at the top right corner.
Countries tab
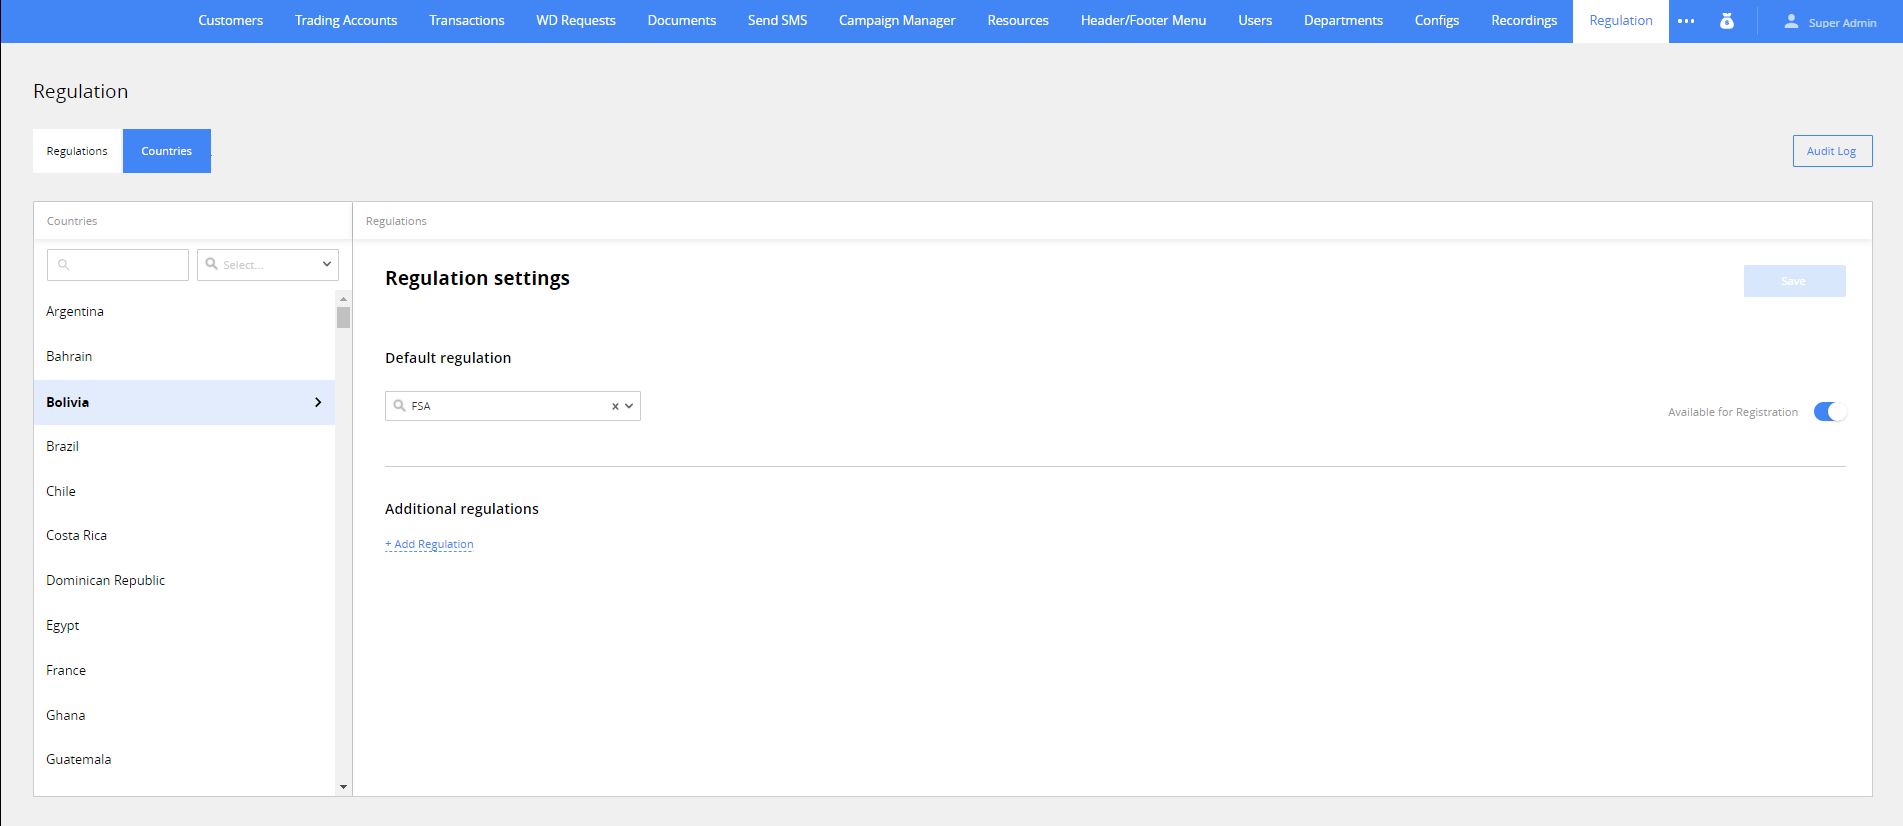
On the Countries tab, you can select which regulations are active for a particular country and if customers from this country can register on your brand.
Settings on this tab are divided by columns with the following headers:
- Countries. Use search and filter tools below to find the country you need, or display only the countries with a specific regulation.
- Regulations. Select primary and additional regulations for the selected country. See more: Create and manage a Regulation
- Available for Registration. Switch ON for the country to give customers with the country’s IP addresses the ability to register.
Note*. Even when the country is closed for registration, customers from it can register if they use VPN to mask their location. Please consider this.*
After you’re done, click the Save button at the top right corner.