Roles & Permissions
The Roles & Permissions section is used for setting up access to system modules and functions.
To each user, one or several roles could be assigned. The assigned roles provide the user with access to corresponding modules and functions.
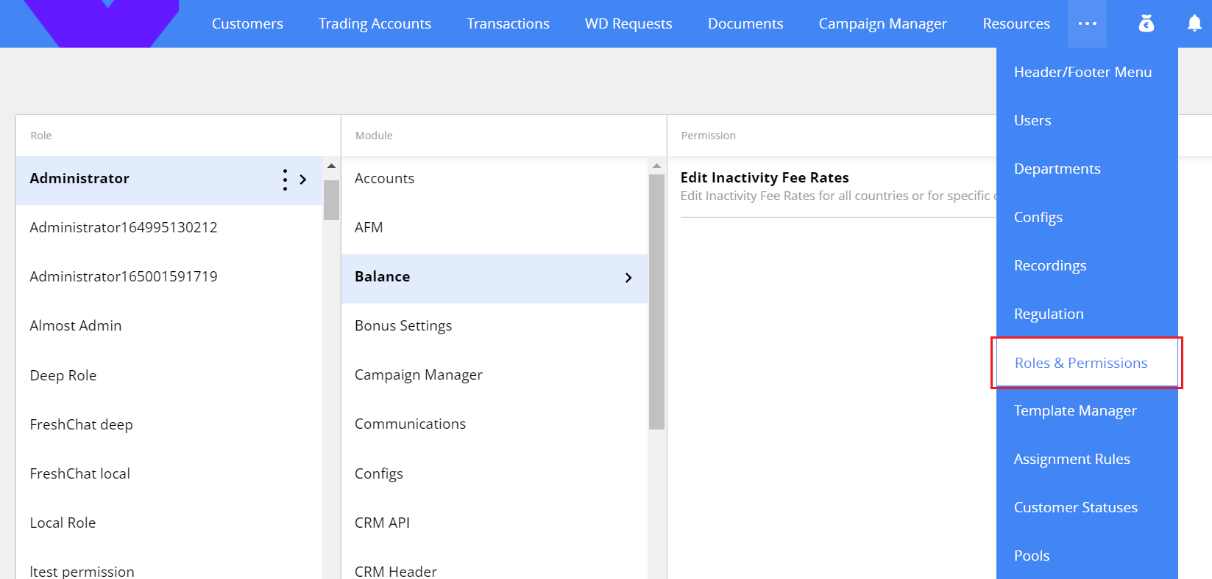
Note. To open the Roles & Permissions page, you must have the permission “Access to pages Roles & Permissions”.
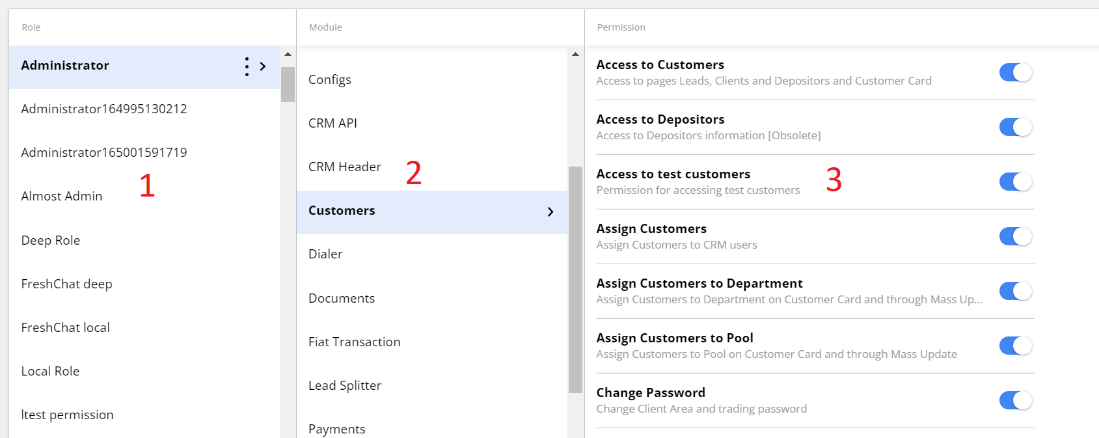
The section consists of three columns.
-
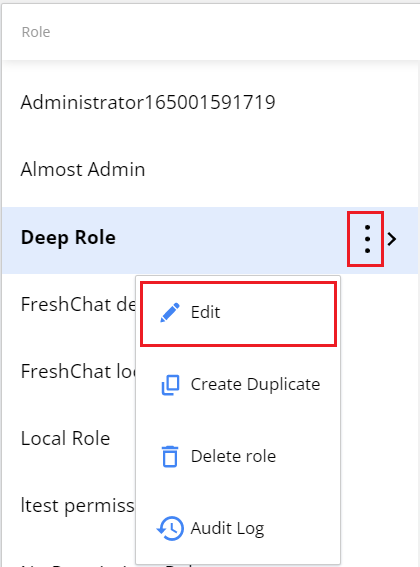
Role. List of all existing roles. You can duplicate or edit a role, delete a role or view the history of changes in the Audit log.
-
Module. List of all existing functional modules. The list isn’t editable.
-
Permission. All functions that are available for the module. To see the list, you need to select the module first. To grant access, find the permission needed, and turn the switcher on.
Note. To add, update or delete available permissions, the Admin console of a related service should be updated. The team that owns the service must make the change in the Admin console, providing the permission item, as well as the module to which the permission relates. Then Admin console will communicate the changes to the Identity service, which will return permissions changes in UI.
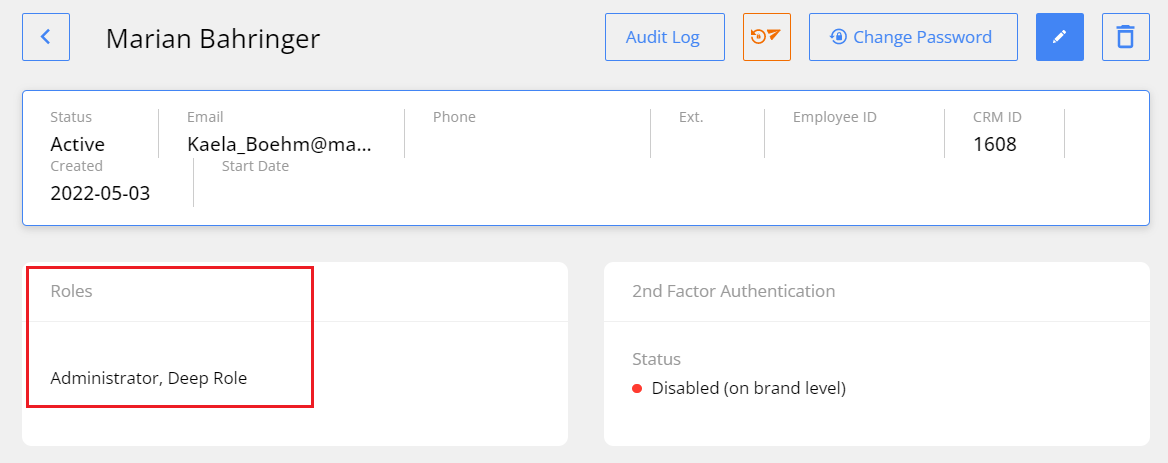
Check out the user’s permission
To get the information about the user’s permissions:
- Find out what roles the user is in. To do that, go to the Users section and open the user page. Check the data in the Roles field.
- In the Roles & Permissions section find the role needed and select one of the modules. You will see the list of permissions granted.
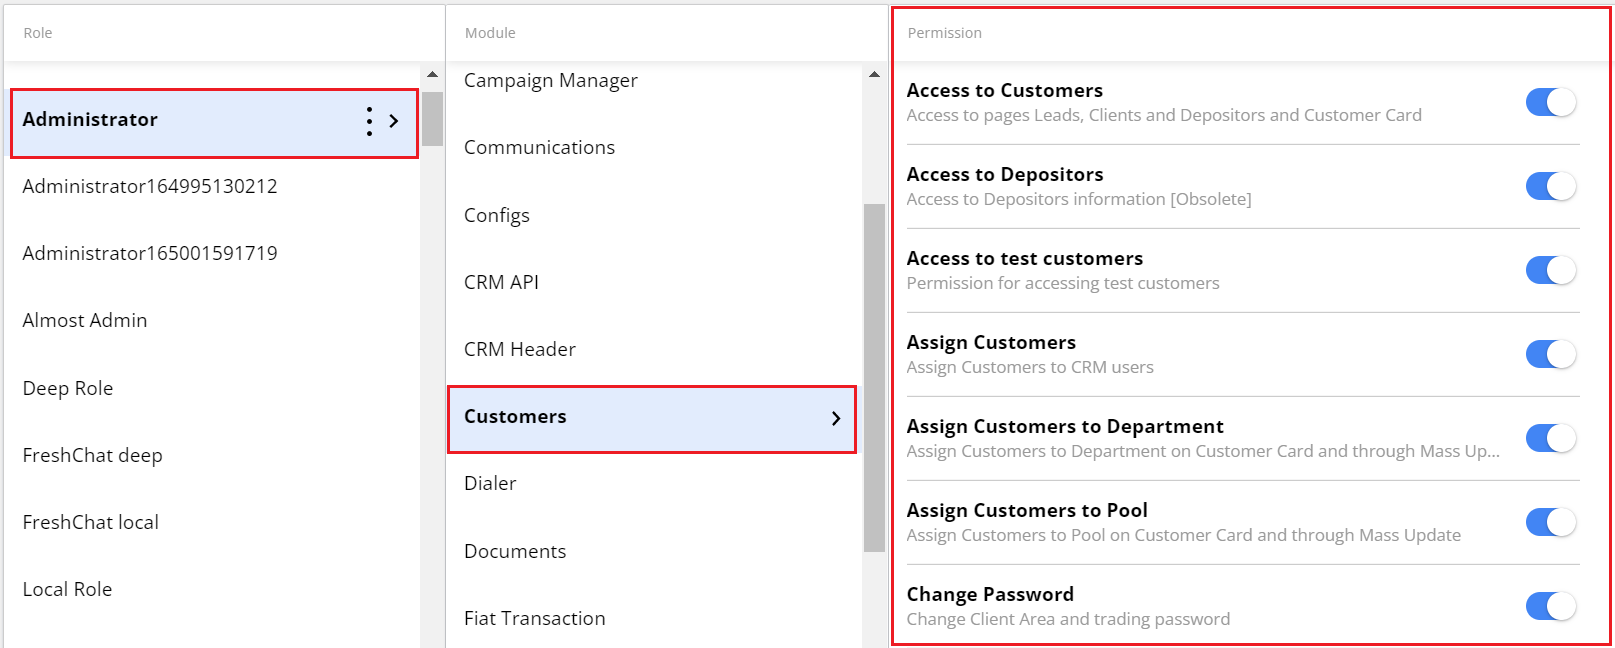
Note*. Since a user might be included in several roles, they will get the highest access permissions of these roles.*
Set up the permission
Let's look at an example. We need Opening Agents not to have the possibility to delete customer comments.
- Open the Roles & Permission section.
- Find the Opening Agents role and select it.
- Select the Customers in the Module column.
- Find the permission needed (in our case it’s Delete Comments) and turn the switcher OFF.

Note. The users need to relogin for new permissions to take effect.
Duplicate a role
You can duplicate the existing role to create a new role with a modified set of permissions.
- Select the role and click
 -> Create Duplicate.

-
A separate window will be opened.
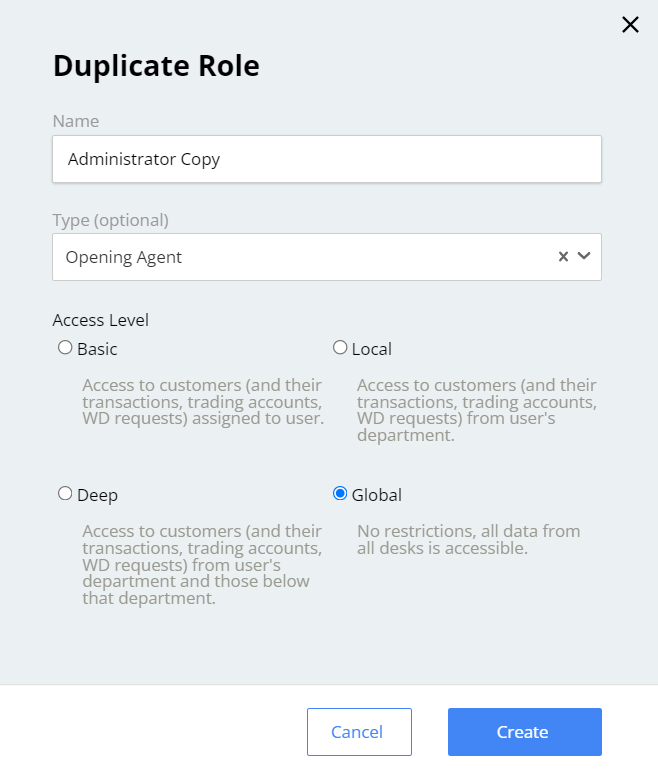
Name. Enter the title of the role.
Type. Type of the role, for example, Opening Agent or CRM Operator. The field is optional.
Access Level. Specifies the filtering of customers, their transactions, trading accounts, WD requests that the role has access to.
Basic. The user will have access only to records assigned to them. Use this option, for example, for Agents.
Local. The user will have access to records assigned to their department. Use this option, for example, for Lead Desk.
Deep. The user will have access to records assigned to their department and those below that department.
Global. The user will have access to records assigned to all desks.
- Click Create. The new role will be added to the role list. All the permissions will be inherited from the copied role.
Edit a role
To edit the role, select the role and click ![]() -> Edit.
-> Edit.
A separate window will be opened, where you can edit the name, type, or access level of the role.
Note. System roles, for example, Administrator, cannot be edited.
Delete a role
To delete the role from the list, select the role and click ![]() -> Delete role. Confirm the deletion.
-> Delete role. Confirm the deletion.
Before deleting, make sure there are no users assigned to this role.
Note. System roles, for example, Administrator, cannot be deleted.
Audit log
To get the information about permission setting changes use the Audit log. To open it, select the role and click ![]() -> Audit Log.
-> Audit Log.
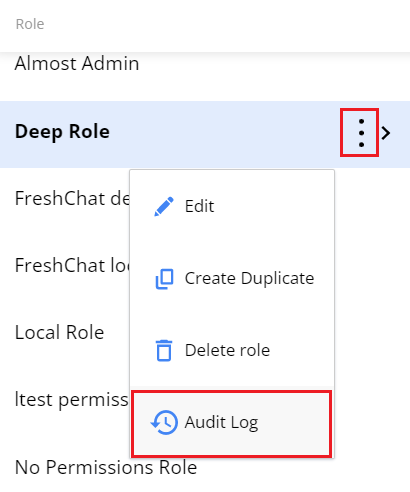
The audit log will be opened in a separate window.

The records in the log are displayed starting from the latest ones.
The information is divided into columns:
Date and time of change (user local time is used)
Name of the user who performed the change, and their IP address
Name of the changed functional module and permission
Previous and current permission values (Enabled/Disabled).