Trading Groups Config
Use the Trading Groups Config to set up the opening and updating of trading accounts:
Server types–Live or Demo servers
Account tiers–types of trading accounts, as the customers will see them (for example, Silver, Gold, and Platinum)
Links to specific countries
Supported currencies
Groups for close only mode
Available leverages and the default leverage for account opening
Islamic/Non-Islamic types
Professional groups
Permissions. Trading Accounts -> Access to trading groups configs (viewing), Edit trading groups configs (editing).
Trading Groups Config section has 6-levels structure. The levels are assigned to each other according to the hierarchy:
Servers -> Account Tiers -> Countries -> Currencies -> Details
You can set up the trading accounts by clicking on columns in sequence, for example:
Live MT4 -> Gold -> Latin Countries -> USD.
Servers
The list of servers is predefined and can be configured only by CRM development team.
Account Tiers
Tiers are assigned to a specific server. The tiers are sorted by name in ascending order. You can:
Add a new tier
Edit the existing tier
Delete the existing tier
Set the tier as default

To add a new tier:
-
Make sure that Server is selected.
-
Click +Add link.

-
Enter the tier’s name.
Note. The name should include Latin letters, numbers and spaces only.
The first added tier for Server is set as default. Default tier means it will be set automatically when the trading account is created. To change the default tier, select the tier in the list, click ![]() -> Set as default. The tier can be marked as default only if there is at least one default group configured.
-> Set as default. The tier can be marked as default only if there is at least one default group configured.
To delete the tier, click ![]() -> Delete. After confirming, the tier will be deleted, including all the assigned countries, currencies, and configurations. For trading accounts in which this tier is indicated, the tier will be cleaned up but the accounts themselves will remain.
-> Delete. After confirming, the tier will be deleted, including all the assigned countries, currencies, and configurations. For trading accounts in which this tier is indicated, the tier will be cleaned up but the accounts themselves will remain.
Note. The default tier cannot be deleted. To delete it, you should first set another tier as default.
Countries
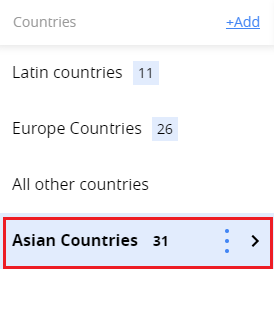
Countries are assigned to a specific tier. The “All countries” row are always presented in the column. After adding at least one country to the list, it changes to “All other countries.” You can:
Add a country to the list
Create a group of countries and add it to the list
Edit the group of countries
Delete the country or the group of countries from the list
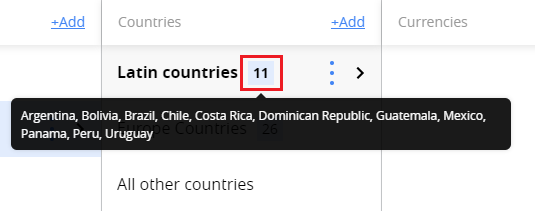
If it's a group of countries, near the group name, you will see the counter with the number of countries. Hover over the group counter to see the countries included.
To Add a group of countries to the list:
-
Make sure that Server and Tier are selected.
-
Click +Add link.

-
Select the checkboxes to add the countries to the list. Use the search bar on the top to find the country. If you select more than one country, the group will be created automatically, and the required Group Name field will appear.

Note. The country can be added to the list for a specific tier only once. If you cannot find the country in the list, make sure it is not already added to the list, separately or as a part of the group. The same country can be added to different tiers.
-
Enter the name of the group and click Add.

Note. The group name should consist of 2-50 symbols and be unique for this tier.
As a result, you will see the new group in the list, and the counter will show the number of countries included.
You can edit it anytime: change the group name, add, or delete countries.

To delete a country or a group of countries, click ![]() -> Delete. After confirming, the countries will be deleted, including all the assigned currencies and trading groups.
-> Delete. After confirming, the countries will be deleted, including all the assigned currencies and trading groups.
Currencies
Currencies are assigned to a specific country. You can:
Add a new currency
Delete the existing currency
Set the currency as default
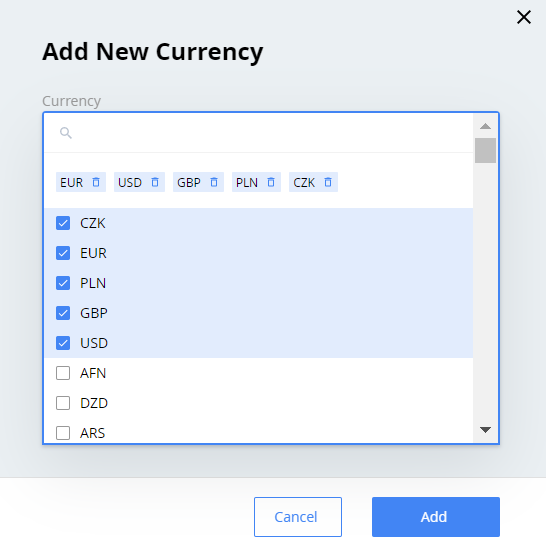
To add a new currency:
- Make sure that Server, Tier, and Country are selected.
- Click +Add link.

-
Select the checkboxes to add the currencies to the list. Use the search bar on the top to find the currency.
Note. If you cannot find the currency in the list, make sure it is not already added to the list.
-
Click Add.
As a result, all the currencies selected will be added to the list. First added currency will be set as default.
Default currency means it will be set automatically when trading account is created. To change the default currency, select the currency with assigned trading group and click ![]() -> Set as default. After confirming, the default currency will be changed.
-> Set as default. After confirming, the default currency will be changed.
Note. If the currency has no trading group assigned, it cannot be set as default.
To delete the currency, click ![]() -> Delete. After confirming, the currency will be deleted, including all the assigned configurations.
-> Delete. After confirming, the currency will be deleted, including all the assigned configurations.
Note. The default currency cannot be deleted. To delete the default currency, you should first set another currency as default.
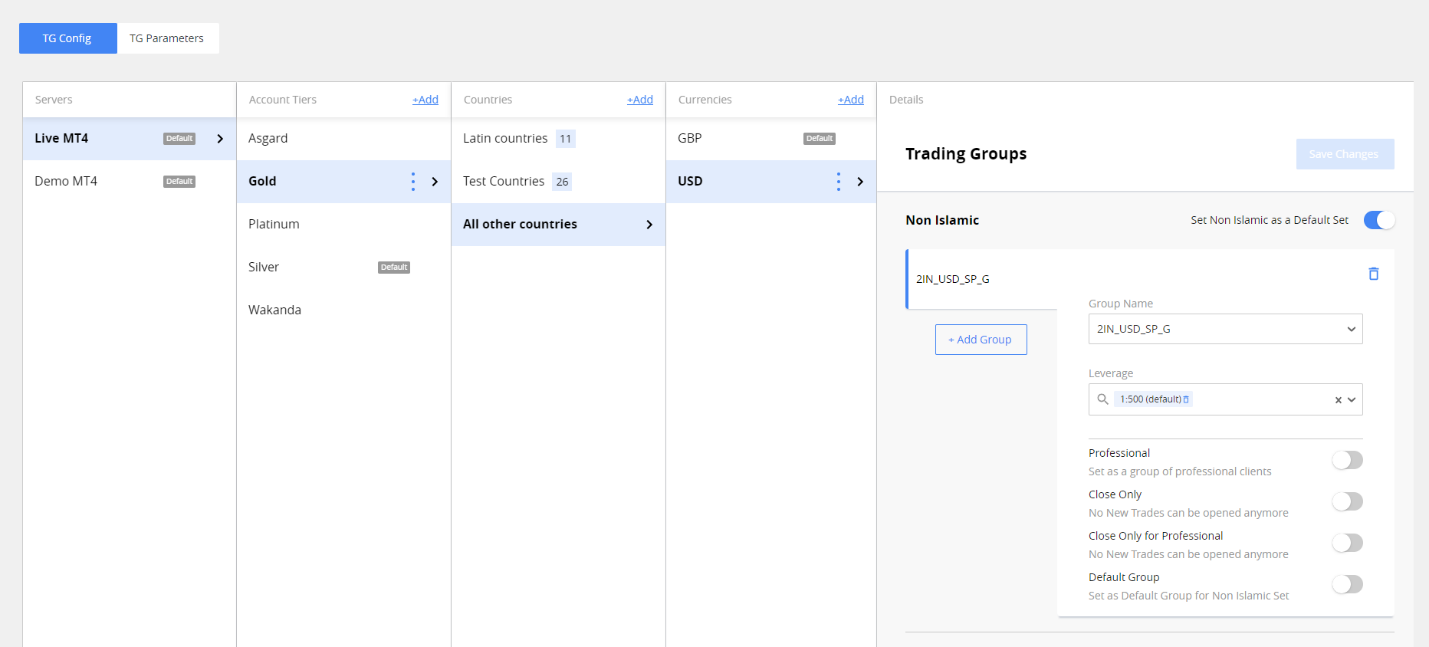
Trading Groups
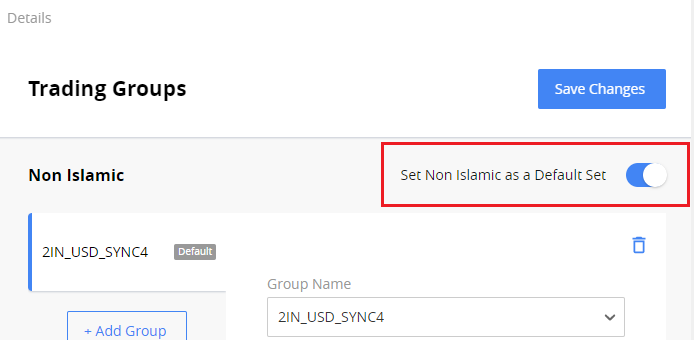
Here you can create trading groups and configure them for each currency. The settings will be used when a trading account is created or updated. For each currency, the Islamic and Non Islamic sets of groups are always presented. You can configure groups for one of the sets and leave the other one empty.
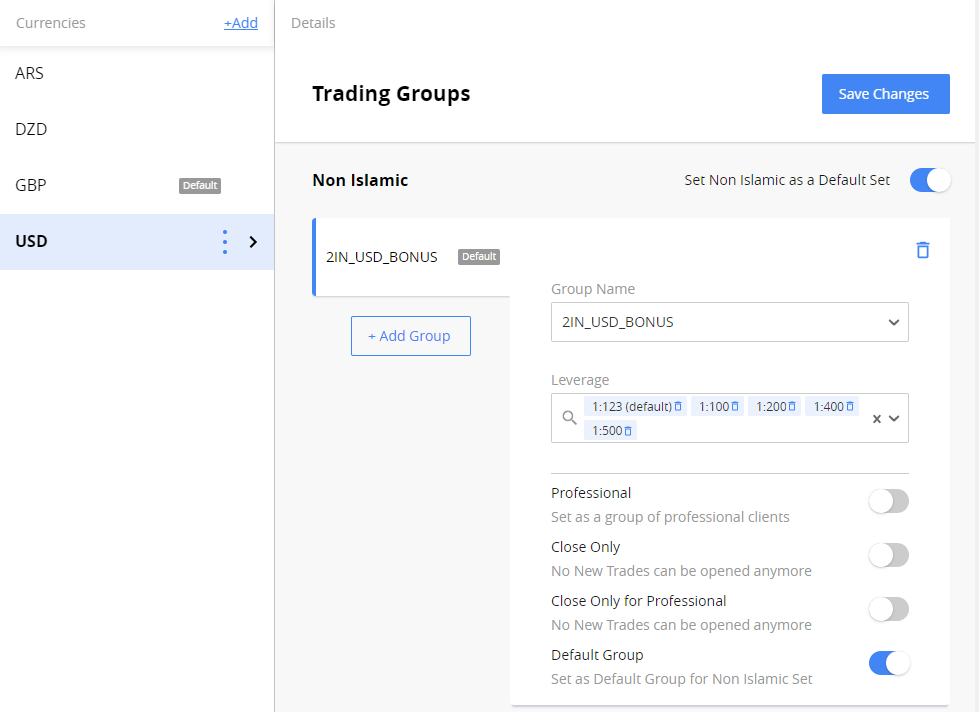
It’s also possible to select which one of the sets will be used as default.
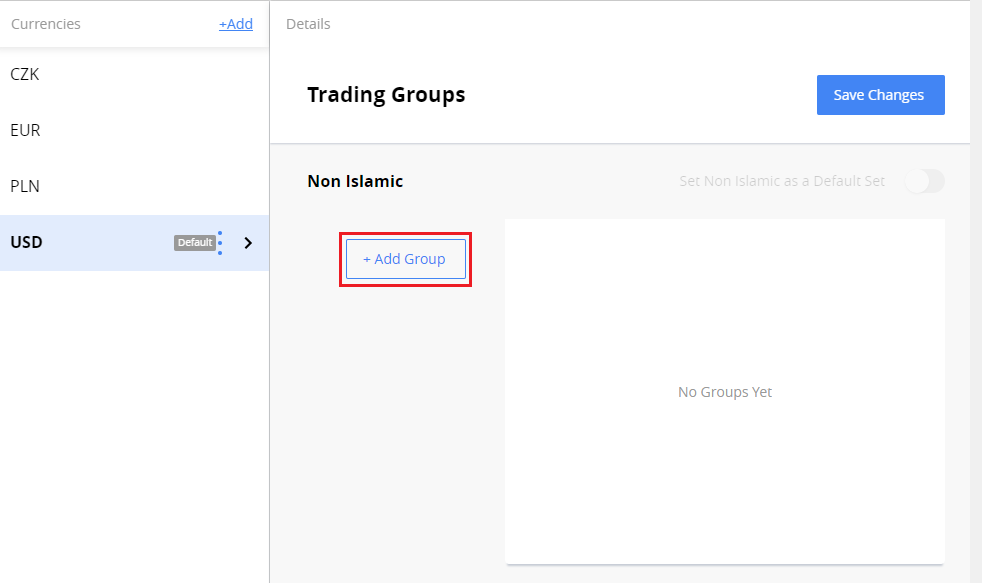
To create a group:
-
Make sure that Server, Tier, Country, and Currency are selected.
-
Select Non-Islamic or Islamic type and click + Add Group button.
Note. If there is no Islamic group, the Islamic trading accounts could not be created.
-
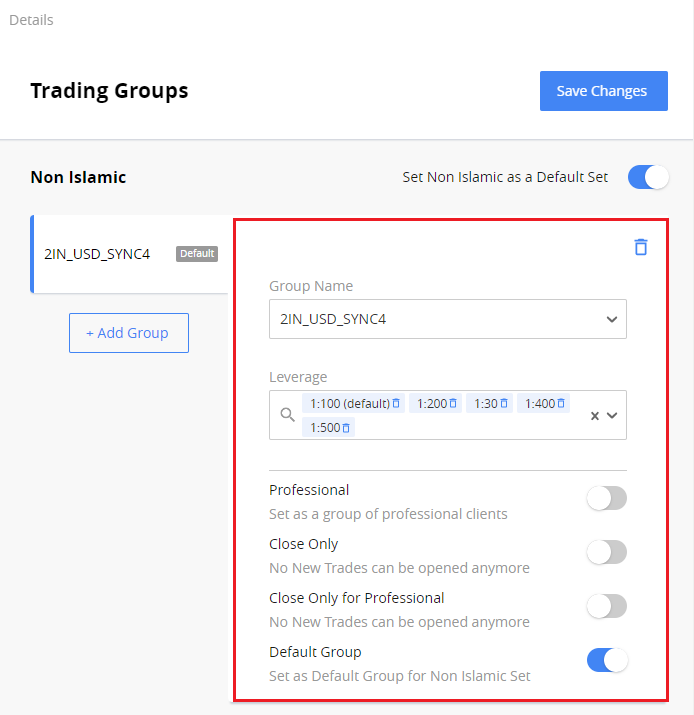
Fill in the fields:
Group Name – select the group from the list of MT4 groups. The list of groups is configured on MT4 server. In the list, you can see only the groups for the selected currency, excluding the groups that are already set in the current group set (for the chosen countries' branch), and for other tiers.
Demo Balance – type the amount that will be credited when demo account is created. It is displayed only for Demo accounts.
Leverage – select all the leverages available for the selected currency. The first added leverage will be set as default, i.e., it will be applied automatically for created trading account. The list of leverages is predefined in CRM: 1:30, 1:100, 1:200, 1:400, 1:500. However, any leverage can be set for specific MT4 account from MT4 server side.
Professional – turn on to mark the created trading account as Professional. Only one group in the group set can be marked as Professional. If there is another group marked as Professional, the toggle will be off for existing professional group.
Note. If there is no Professional group, the Professional trading accounts could not be created.
-
Close Only – turn on to mark the created trading account as Close Only. Only one group in the set of groups can be marked as Close Only. If there is another group marked as Close Only, the toggle will be off for existing close-only group. When the Close only status is set to the trading account, it is moved to the Close Only group. After that, if the account status will be changed, the account is moved to the group he was in before.
-
Close Only for Professional – turn on to mark the created Professional trading account as Close Only. Only one group in the set of groups can be marked as Close Only for Professional. If there is another group marked as Close Only, the toggle will be off for existing close-only for professional group. When the Close only status is set to the professional trading account, it is moved to the Close Only for Professional group. After that, if the account status will be changed, the account is moved to the group he was in before.
-
Default Group – turn on to make the group default for current set of groups. Only one group can be marked as default for each Islamic and Non-Islamic sets of group.
-
Click Save changes.
Note. The changes don’t apply automatically. If you don’t save changes, they will be lost.
To delete the group, click ![]() .
.