Withdrawal Requests
The withdrawal is the act of removing fund from customer’s trading account. It usually comes with a service fee.
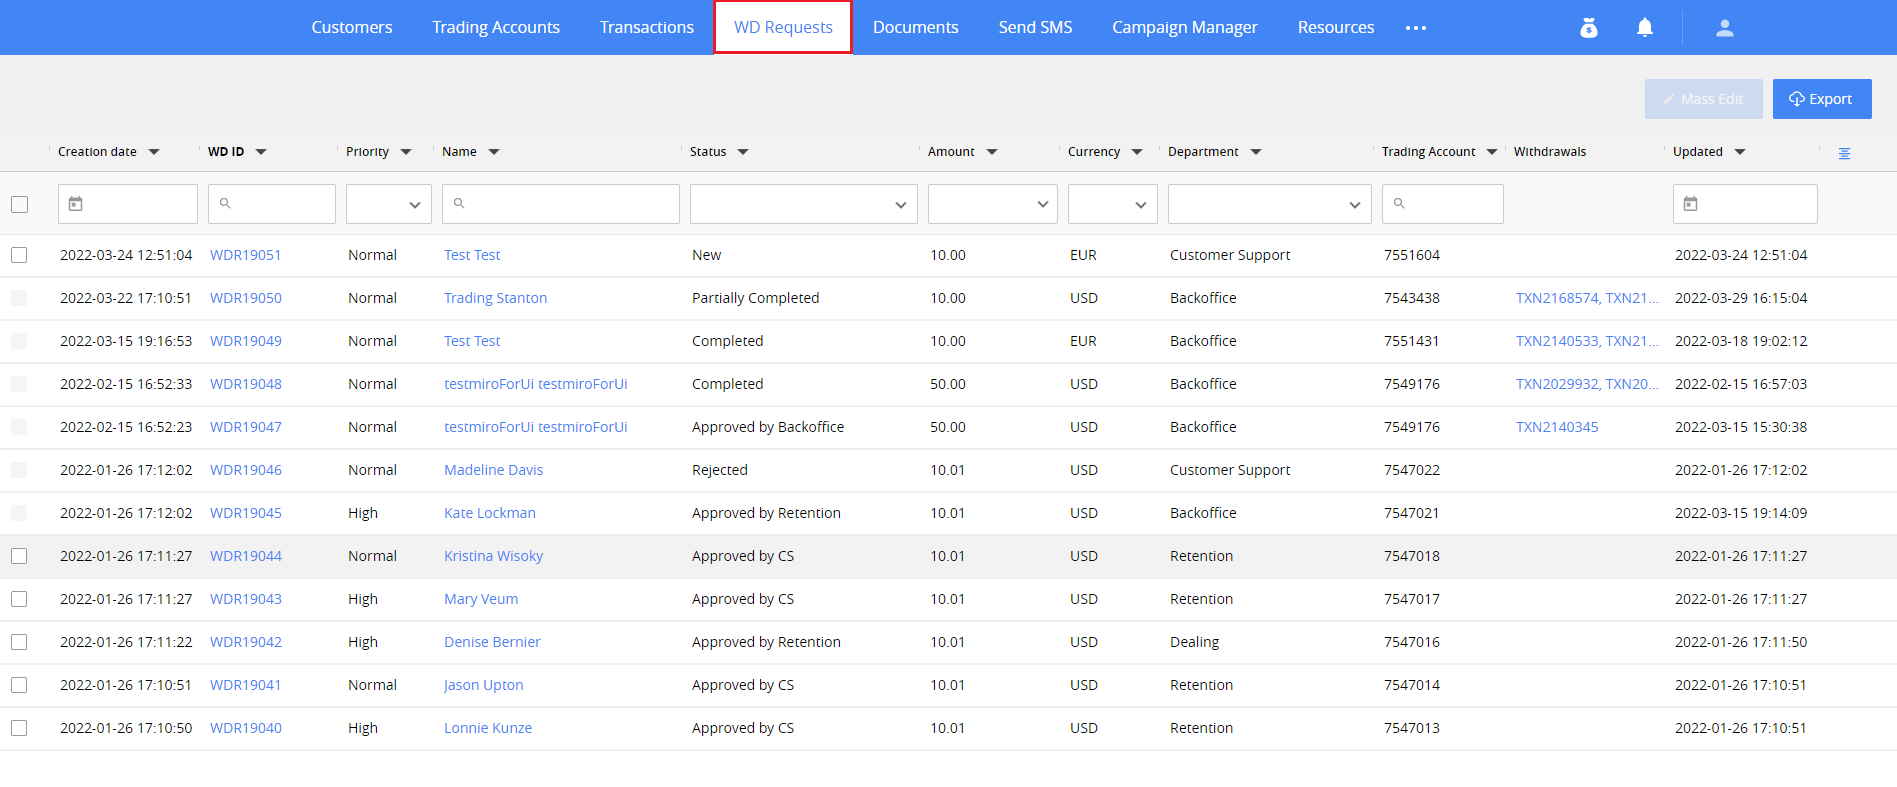
Use the WD requests section to find the information needed about all the withdrawals.
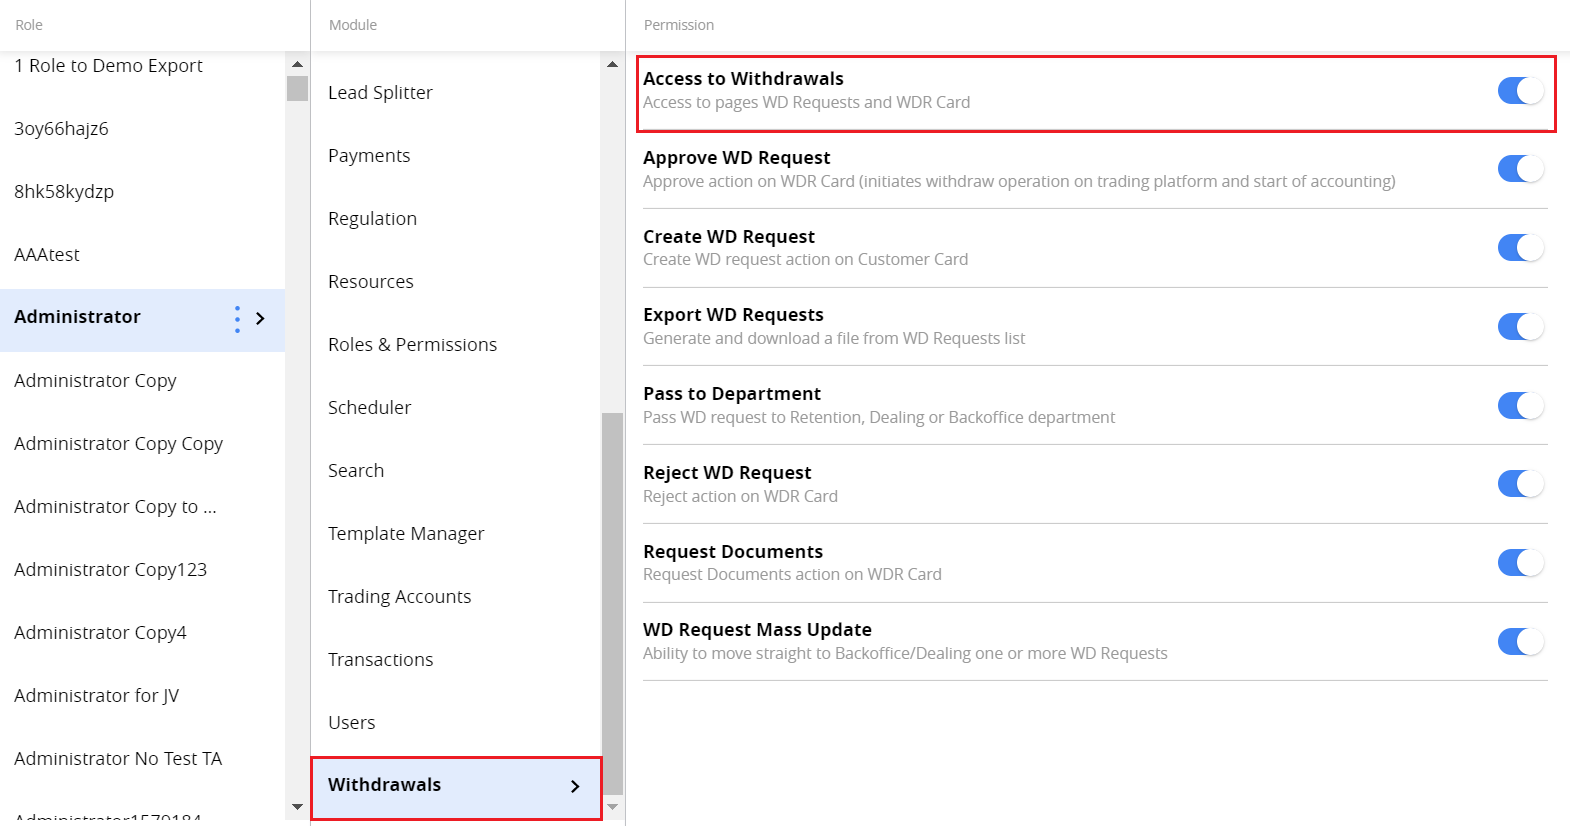
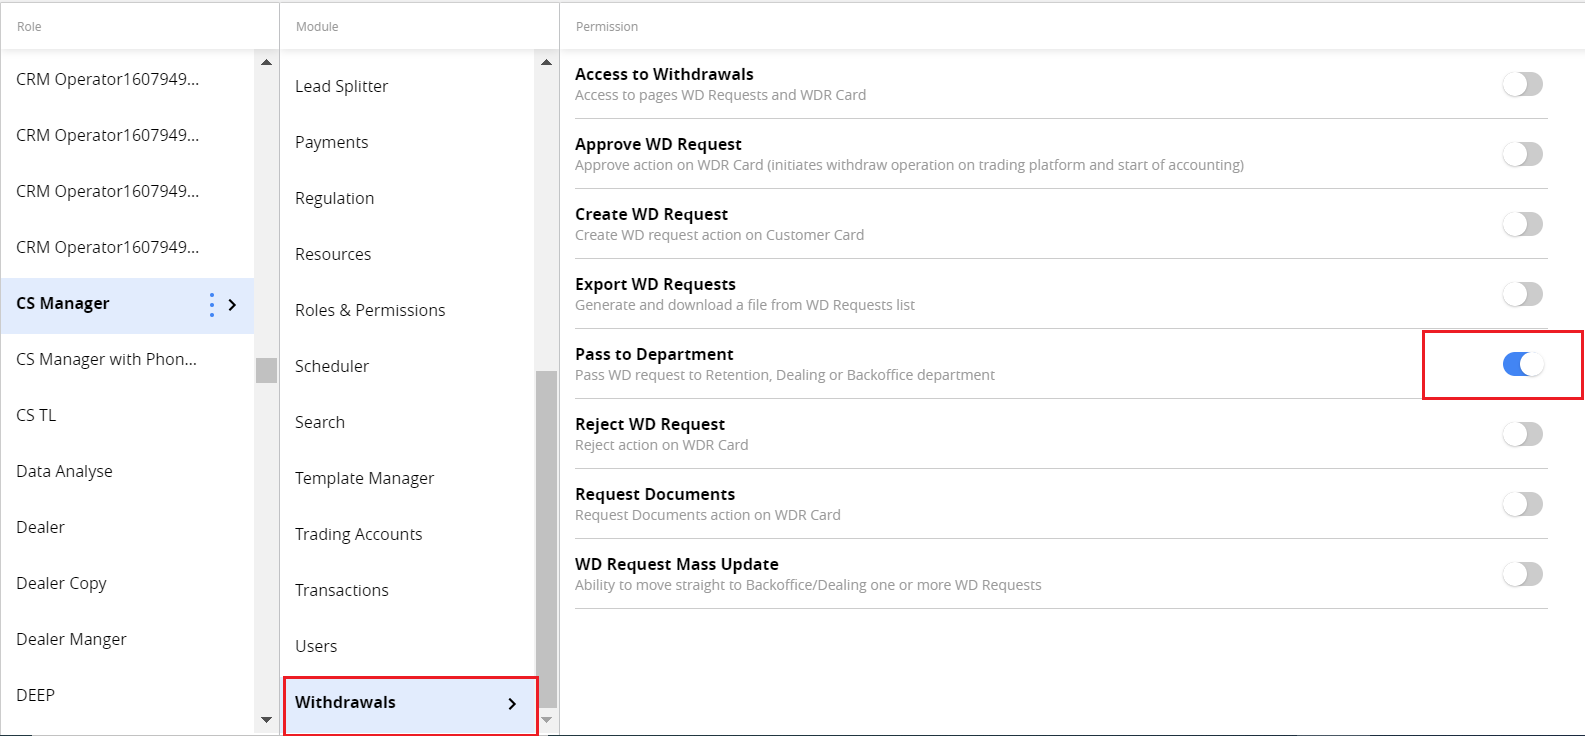
Permissions: Withdrawals > Access to withdrawals.
The WD Request can be created in such ways:
Automatically after initiating by a customer in Client Area,
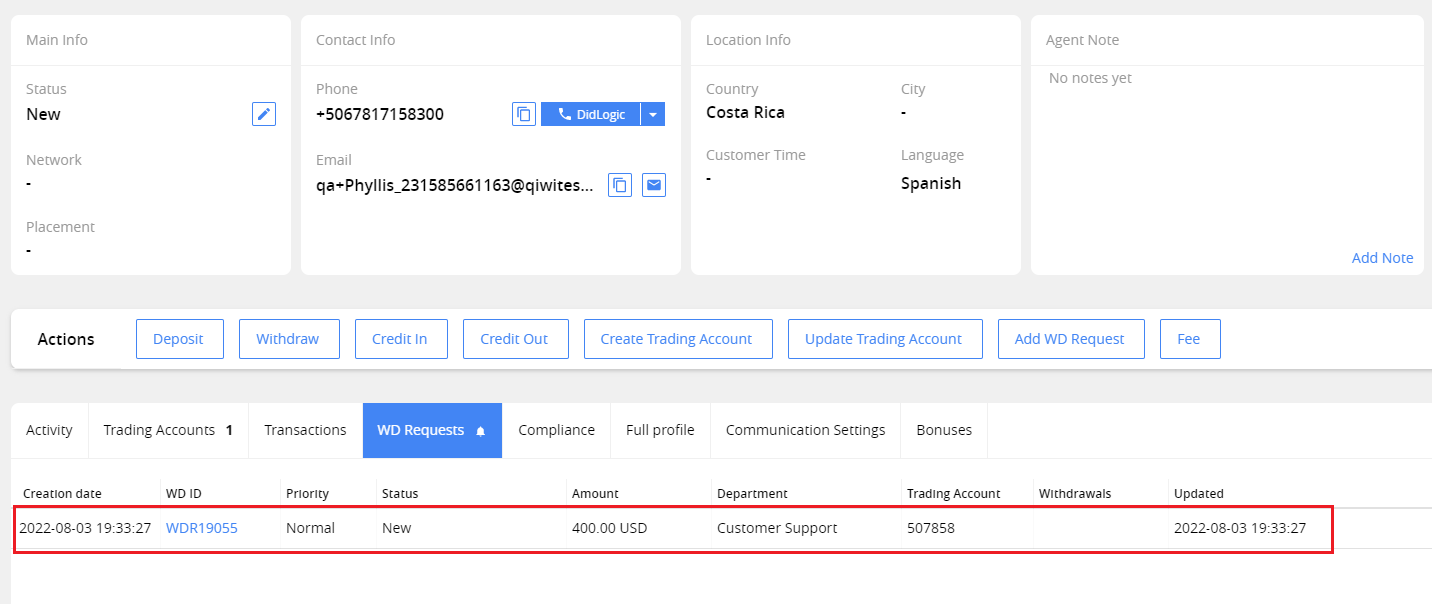
Manually, on the Customer card.
Note. The withdrawal balance operation on the trading platform may be performed by CRM user without the withdrawal request in case of a chargeback, fraud activity, or accounting mistakes.
When WD request is created, it has the New status. After creating, no withdrawal or MT4 balance operation is performed automatically. To be compliant with the law, the request should be processed within specified period. Before the transaction processed, there is several checks performed by Customer Support, Retention, Dealing and Backoffice departments. See more: WD Request Statuses
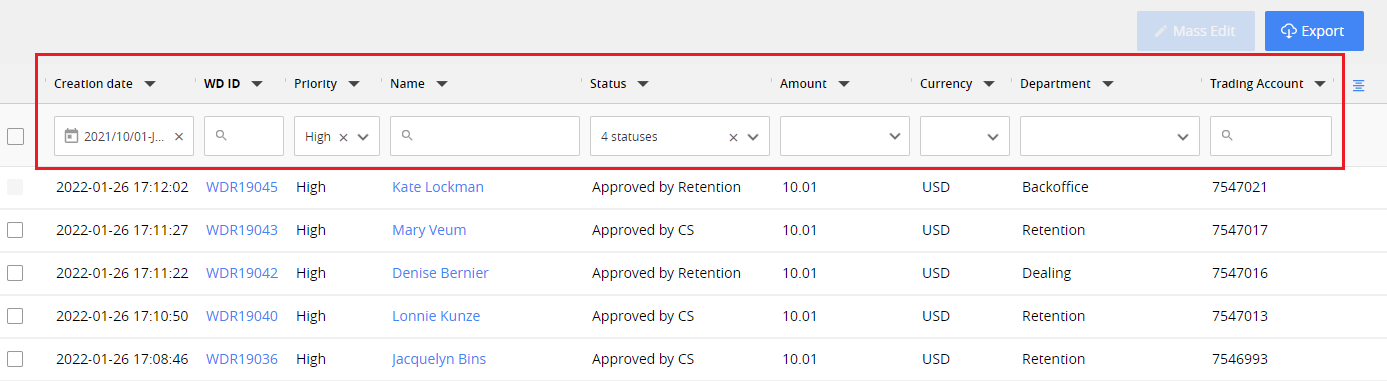
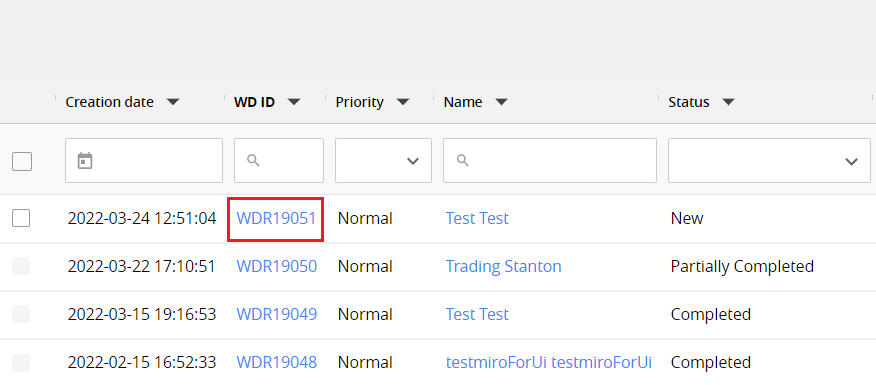
To find a WD request in the grid, you can use filtering and sorting tools.
In the grid, you can see the WD requests details: ID, status, amount, currency etc. These columns are also available in the WD request card.
You can customize columns in the main grid by clicking corresponding button.

Note. Due to screen resolution, the button may be out of sight. Please scroll to the side right if you cannot see the button.
WD Request Card
All information about the WD request is collected on the card.
To open it, click WD ID link in the main grid.
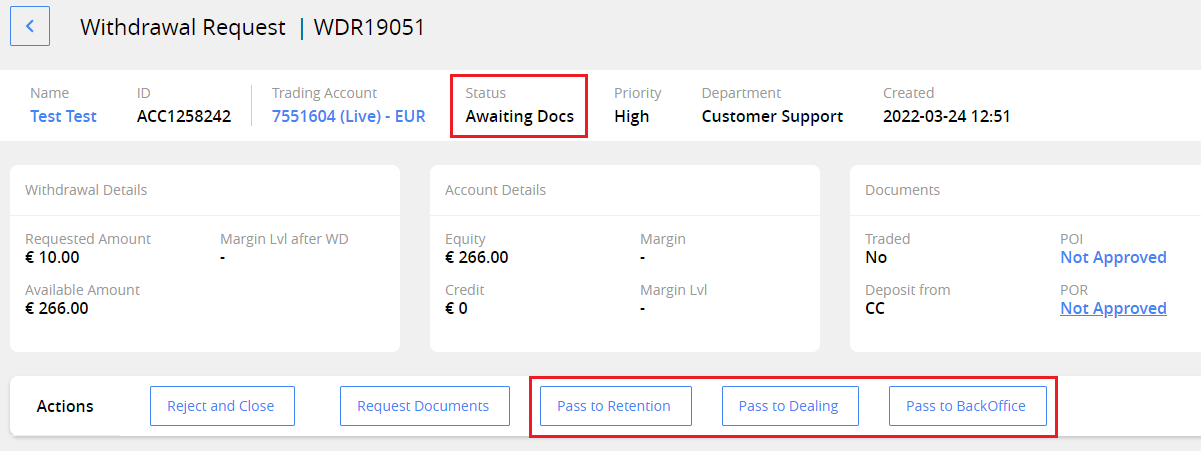
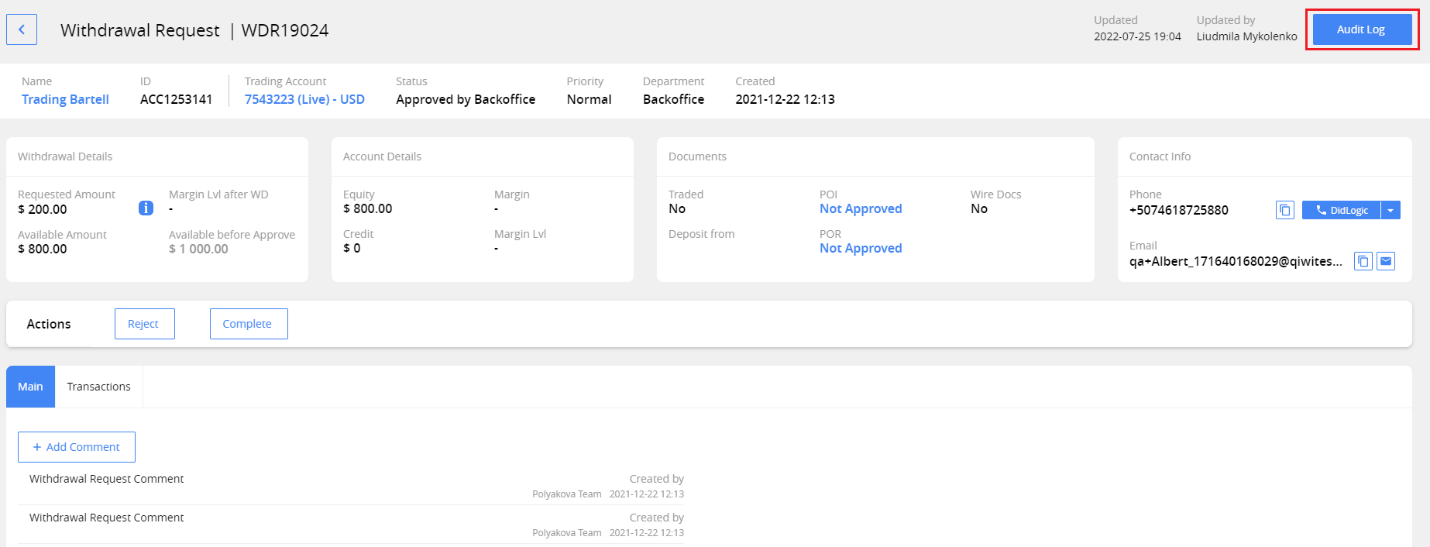
The WD request card consists of several areas.
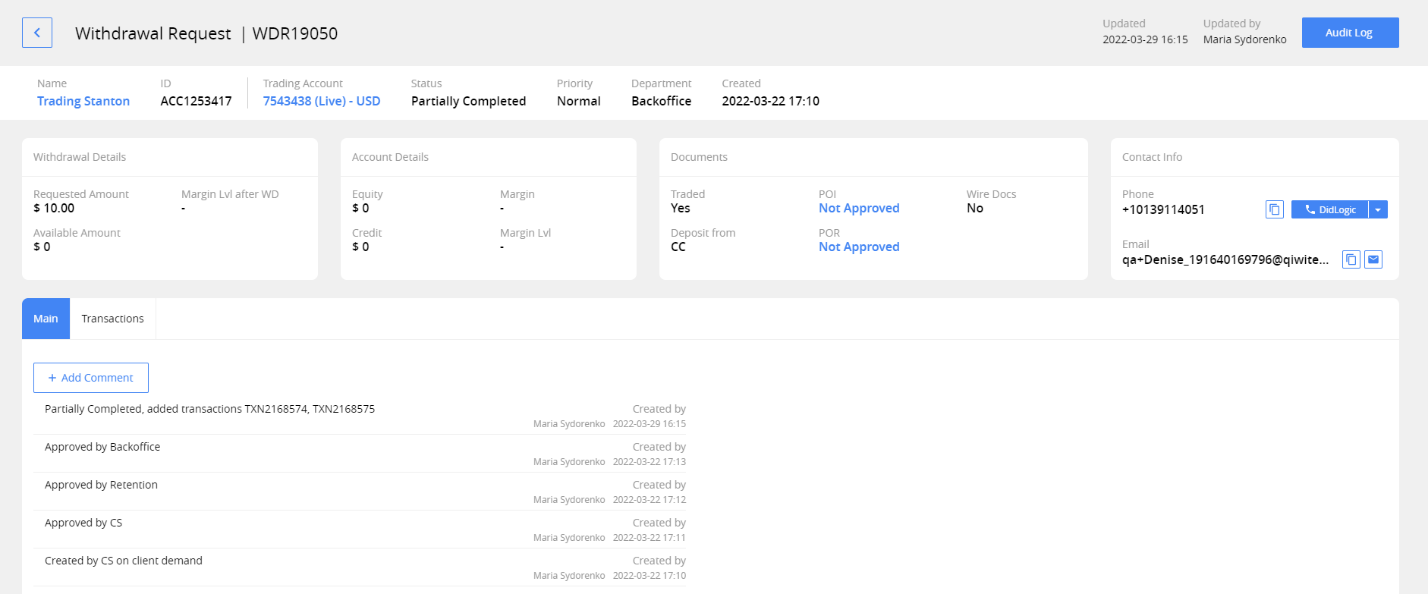
In the header, you can see:
Customer’s name (link to customer card) and ID
Trading Account number (link to trading account card)
WD request Status
Priority
Department
Creation Date
You can find more information below:
WD Details
Account Details
Documents
Contact info
Actions
Comments
Transactions
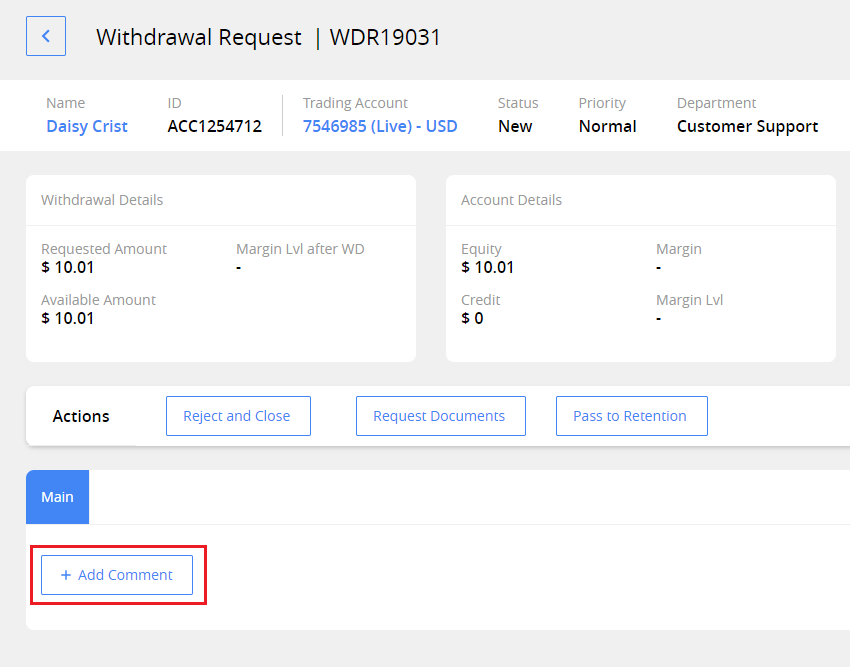
Actions
The actions are available in the middle area of the WD request card and aimed to change the WD request status during the workflow.

The set of actions depends on WD request status. There are no actions available on final statuses of WD Request workflow (Completed, Partially Completed, Canceled by Client).
See more: WD Request Statuses
Main
Here you can find the notifications on the main events of the WD request, such as creation, approvals by different departments, completion, and transactions created.
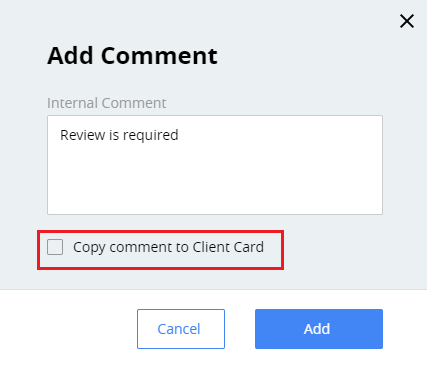
You can add any additional comment to WD Request by clicking Add Comment.
It is an internal comment, and it will be displayed only in the WD request card. To show it in the Customer card, select the option Copy comment to Client Card.
In the Customer Card, the comment will be displayed on the Activity tab and will be marked with a "W" icon.

Transactions
After the WD request is approved by all departments (Approve action is performed), the draft transactions will be created automatically. You can view and edit the parameters of every transaction, and after approving transactions, the WD request should be complete. The transactions can also be added manually.
In this process, you will be working on the Transactions tab.
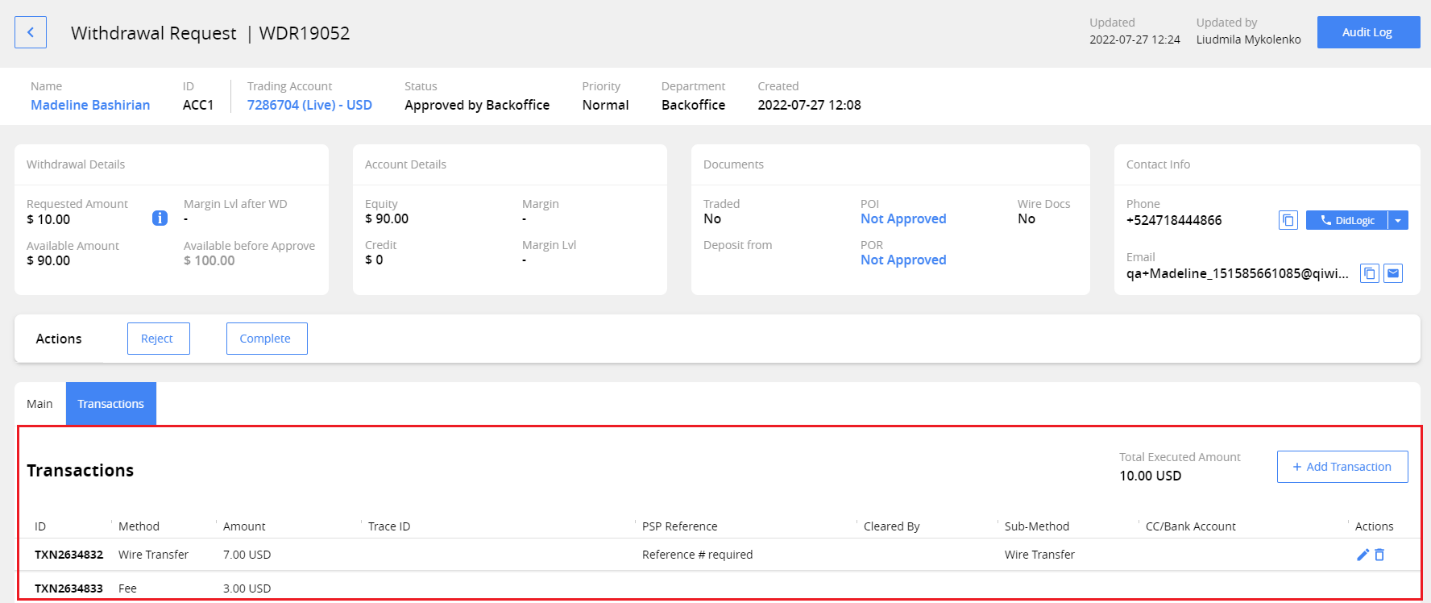
Such payment types could be created on WD requests:
Credit Card
Wire Transfer
Settlement – Credit Card
Settlement – Wire Transfer
Fee
Note. After approving, the fee cannot be edited or deleted.
Edit the transaction
- Select the transaction and click the Edit transaction button.

-
In the window opened, add, or edit the information needed. For example, for Wire Transfer you may need to input bank details.
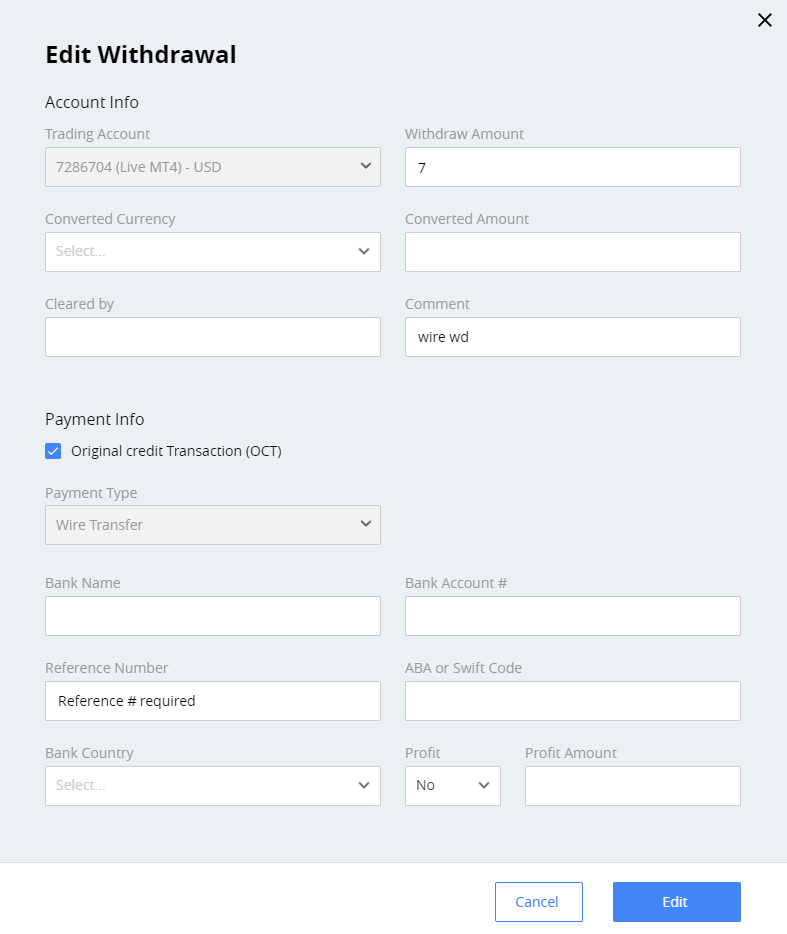
Note. The payment type is not editable. The system takes the method used during the last deposit.
Add the transaction
- On the Transactions tab click Add Transaction button.
- In the window opened, enter Withdraw Amount.
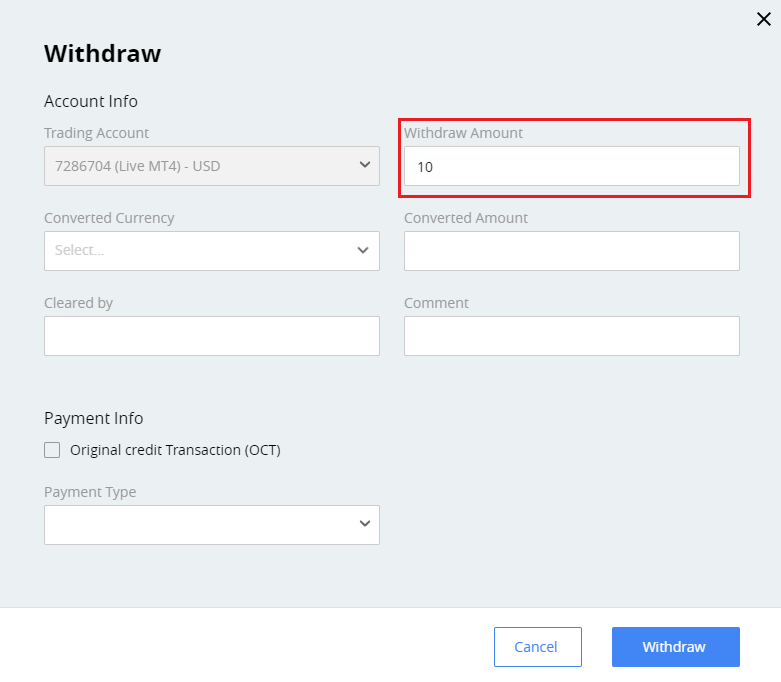
-
If the current transaction delivers funds directly to a customer's eligible account, select the checkbox Original credit Transaction (OCT).

-
Select Payment type, for example, Wire Transfer, and add the bank details.
Note. After saving the transaction, you cannot change the payment type.
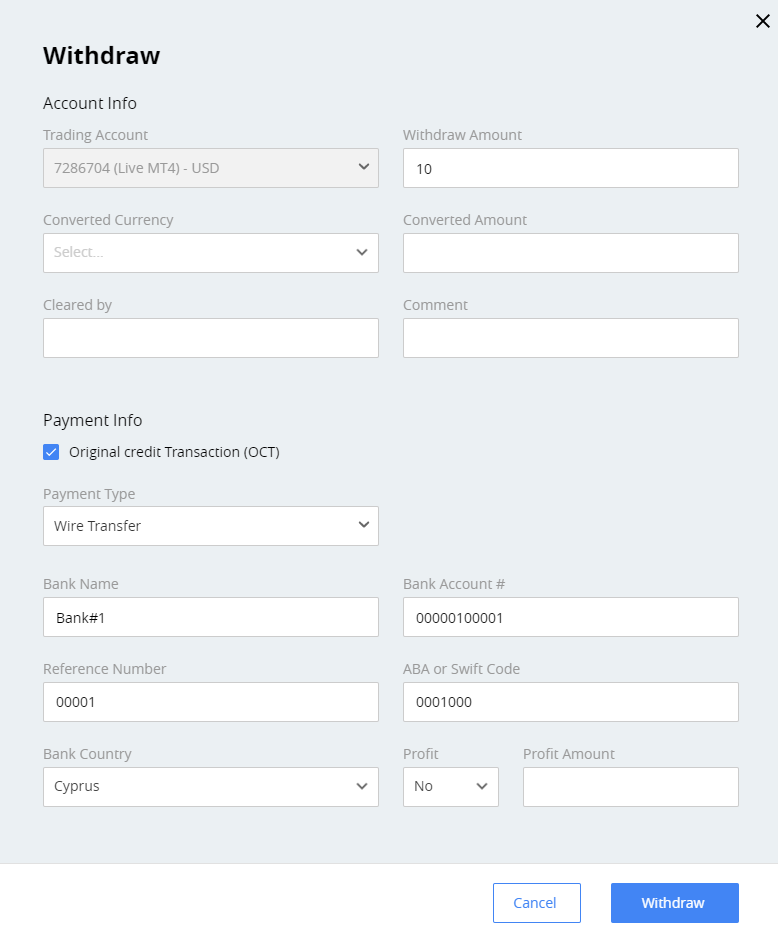
-
Click Withdraw. The transaction will be saved, and you can see it in the list.
Note. The transaction will be processed only after clicking Complete action in the WD request card.
Delete the transaction
To delete the transaction, select it in the list, and click the Delete transaction button.

After confirming, the transaction will be deleted permanently. You can create another transaction manually.
WD Request Statuses
Each WD Request, after creation, goes through different stages of verification until being processed by a payment system.
The request should be processed within a specified time to comply with the specific regulations. Before the transaction proceeds, there are different approvals performed by Customer Support, Retention, Dealing, and Backoffice departments. These stages are parts of the WD Request workflow.
WD Request workflow
The status indicates the current stage of a WD request within the workflow. During the process of WD request approval users from different departments are entitled to set certain statuses to a WD request according to the roles and permissions.
To change the status, you should perform the corresponding action on the WD request card.
Stages of WD request workflow
The usual path of the withdrawal process, from creation to transferring money to the customer, is described below.
At each stage, there is an option to reject the WD request.
You can return the WD request back to the first stage if some documents are needed.
The customer can also cancel the request at any time from the Client area.
Note. Only the direct workflow is described below. See more about all possible statuses and transitions: WD Statuses Matrix.
1. Customer Support
Status: New
Department: Customer support
Verification:
Compare Available amount and WD Amount
Check required documents
Actions available: Reject and Close, Request Documents, Pass to Retention
Permissions needed: Reject WD Request, Request Documents, Pass to Department
Next Stage: Retention
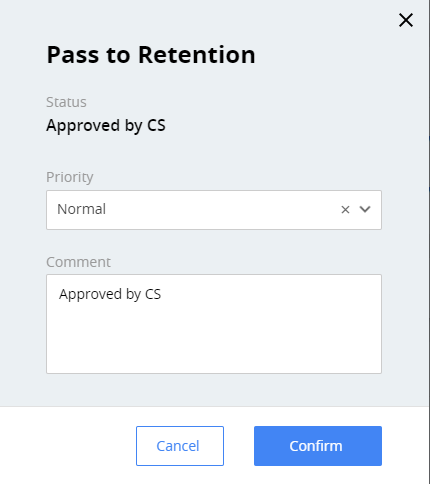
2. Retention
Status: Approved by CS
Department: Retention
Verification:
Make retention call trying to retain money. If successful -> Cancel the WD Request.
Actions available: Reject, Pass to Dealing, Pass to Backoffice, Back to CS
Permissions needed: Reject WD Request, Pass to Department, Request Documents
Previous stage: Customer Support
Next Stage:
Dealing, if there is any open trade
Backoffice, if there are not any open trades
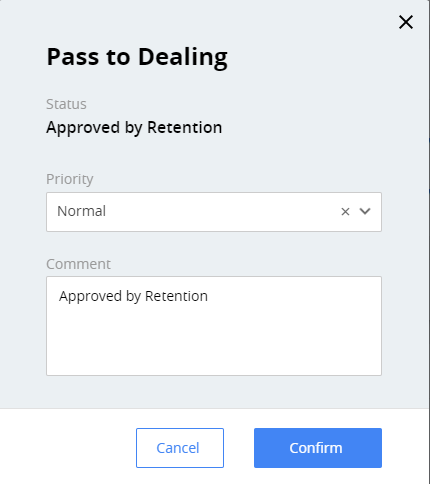
c3. Dealing
Status: Approved by Retention
Department: Dealing
Verification:
Check the current state of balance
Margin level should be 100 or more
The fee amount is specified on this stage.
Actions available: Reject, Pass to Backoffice, Back to CS
Permissions needed: Reject WD Request, Pass to Department, Request Documents
Previous stage: Retention
Next Stage: Backoffice

4. Backoffice
Status: Approved by Dealing
Department: Backoffice
Verification: Check all the stages again:
Are the documents all right?
Is balance all right?
Was there a retention call?
The fee amount is specified on this stage.
Actions available: Reject, Approve, Back to CS
Permissions needed: Reject WD Request, Approve WD Request, Request Documents
Previous stage:
- Retention, if customer has not any open trades
- Dealing, if customer has any open trades
Next Stage: Approved by Backoffice
After approving, the transactions for the withdrawal and the fee are created, and the funds are withdrawn.

5. Approved by Backoffice
Status: Approved by Backoffice
Department: Backoffice
Verification: Check, edit, and approve the transactions.
Actions available: Reject, Complete.
After completion, the transactions will be processed and the MT4 balance operation will be performed.
Permissions needed: Reject WD Request, Approve WD Request.
Previous stage: Backoffice
Next Stage:
Completed, if Total Execute Amount = Requested Amount
Partially Completed, if Total Execute Amount < Requested Amount and Total Execute Amount not only consists of the fee transaction

6. Completed / Partially Completed
These are the final stages of the WD request workflow. The status is set automatically:
Completed if Total Execute Amount = Requested Amount
Partially completed if Total Execute Amount < Requested Amount, and Total Execute Amount not only consists of the fee transaction.
After setting to the Completed or Partially Completed, the status cannot be changed.
Money transferred to customer, transactions cannot be edited or added.
No actions are available on WD request card.
You can see the information about the current WD request in the Audit log.
WD Statuses Matrix
The statuses matrix reflects the WD request workflow per role, including possible transitions between statuses, actions performed, and permissions required.
Each department is allowed to take a certain set of actions according to the permissions given. To change the status, you should perform the corresponding action on the WD request card.
How to interpret the matrix
To interpret the matrix, start with state on the left side (From State) and go to the state on the top of the table (To State).
If the transition is possible, at the intersection you will find:
-
The action required for the transition (for example, Request Documents, Pass to Retention, etc.).
-
The department that performs this action (for example, CS, Dealing, BO).
-
The number from 1 to 5 indicates the required permission:
1–Request Documents
2–Reject WD Request
3–Pass to Department
4–Approve WD Request
5–WD Request Mass Update


For example, let us check the possibility to change Awaiting Docs to Approved by CS status. We found the cell with this information:
Pass to Retention
Pass to Dealing
Pass to Backoffice
CS / 3
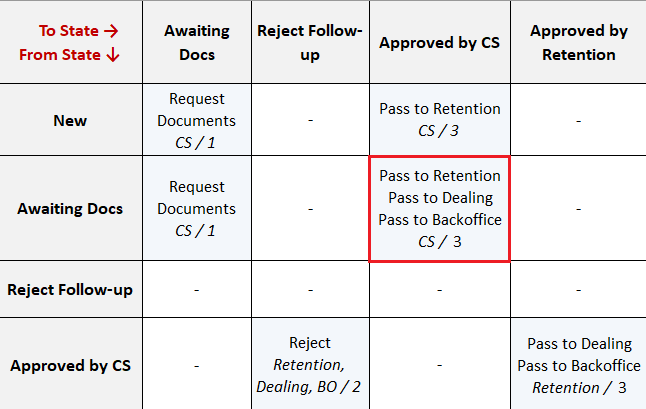
It means, to make the transition from Awaiting Docs to Approved by CS, one of the mentioned actions is used.
The action can be performed by users:
- Only from customer support (CS in the matrix).
- With the Pass to Department permission (3 in the matrix).
Audit log
The system tracks changes of the WD request in the Audit Log.
To view it, open the WD request card and click Audit log.
The audit log will be opened:

Here you can see any changes in the current WD request, and actions, such as approving, adding transactions, or rejecting. The records in the log are displayed starting from the latest ones.
In the header you can also find additional information, including links to the customer card and the trading account card.
The information is divided into columns:
Date and time of change (user local time is used)
Name of the user who performed the change, and their IP address and Role
Action performed
Changes made
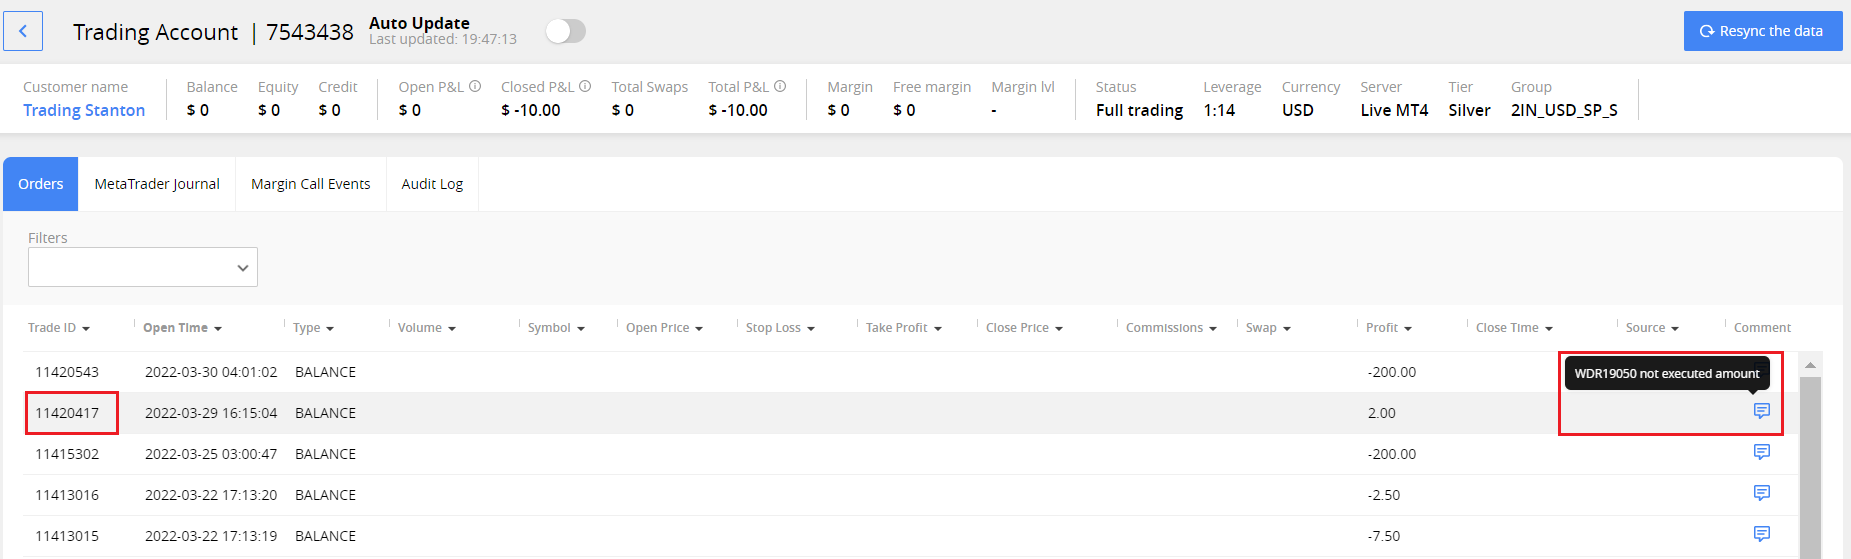
Let us look at an example.
- For a WD request with Partially Complete status, the Audit log provides you with the changes related to the transactions, including TradeID.
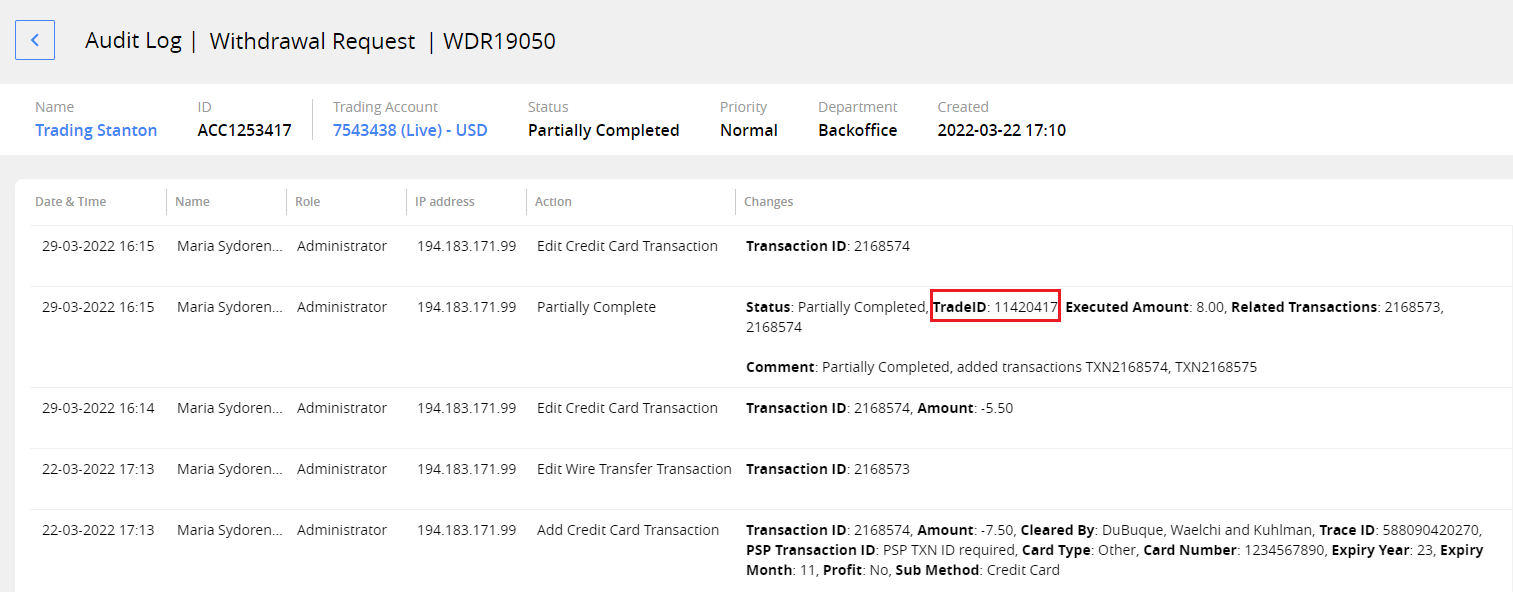
- To find more information, you can go to the Trading Account page by clicking the direct link.
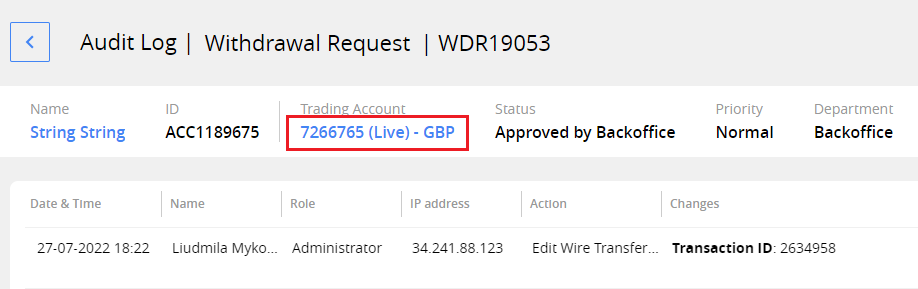
- On the trading account page, you can find the rollback trading order with a comment.
Export WD requests to Excel file
You can export WD requests list to a CSV file. To do this, click the Export button in the main grid.
Permissions: Withdrawals > Export WD Requests.
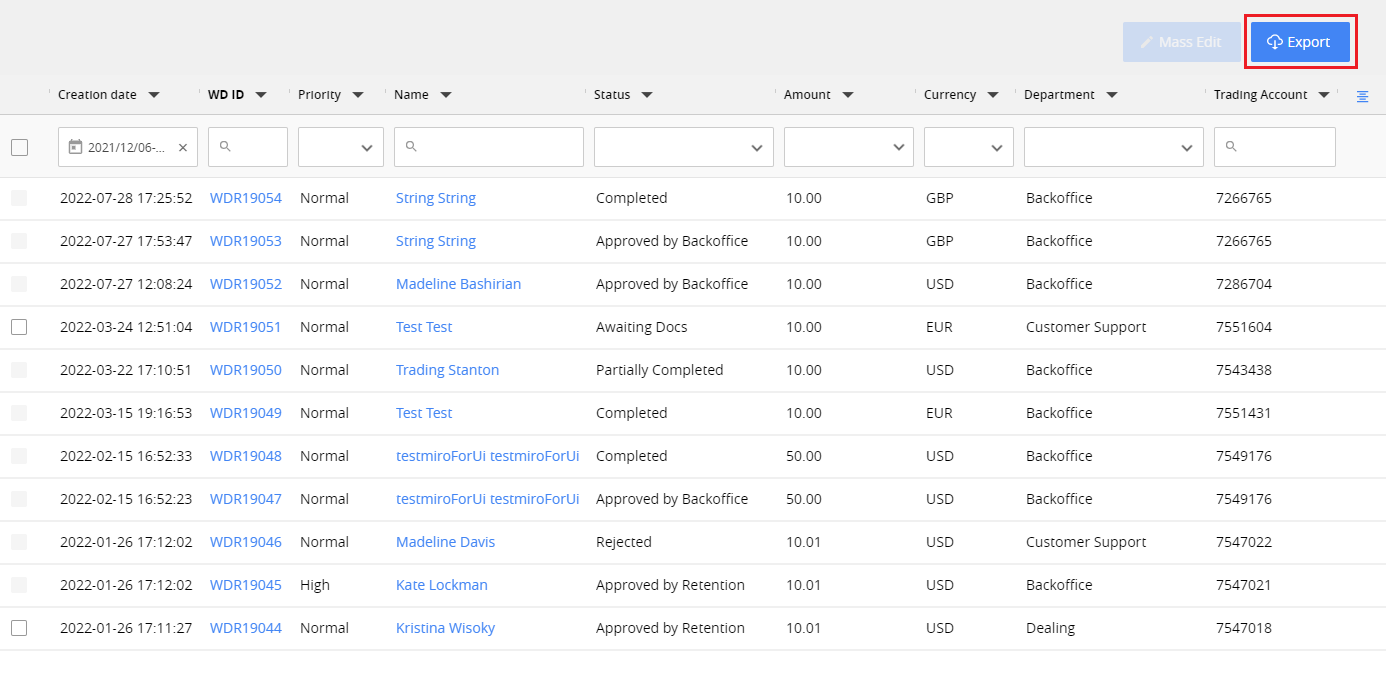
After confirming, the CSV file will be downloaded to your computer:
The file contains the list of WD Requests from all pages of the grid with applied search filters.
The list of columns in the file corresponds to the settings of the main grid.
Mass edit
Use the Mass Edit option during the WD Request workflow to reassign the withdrawal to the Dealing or Backoffice department.
The WD Request status will be changed to Forwarded to Backoffice or Forwarded to Dealing.
Permissions: Withdrawals > WD Requests Mass Update.
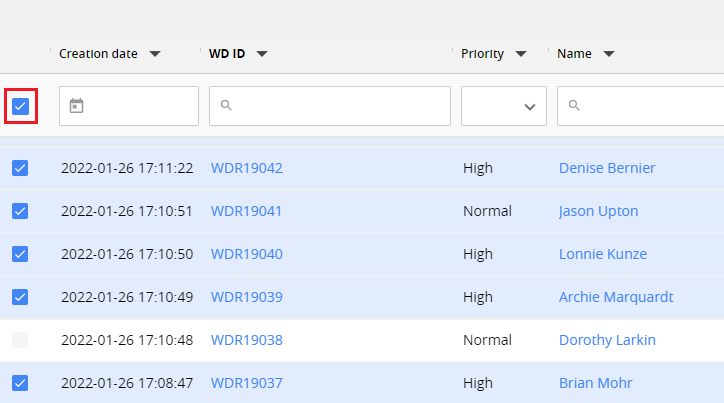
1. Select records to update
You can select records by clicking the checkboxes in the main grid. Also, you can apply the filters and select all the records on the page by clicking the checkbox in the filtering area.
Only the withdrawals in certain statuses can be selected:
Not approved by Backoffice or by Dealing
Not assigned to Backoffice
Not in the final status
Note. You can change the number of records per page up to 100. The control is at the bottom right of the screen.

2. Run Mass Edit
Click the Mass Edit button.

The Reassign of Department window will be opened.
Select the Department to reassign the withdrawals.
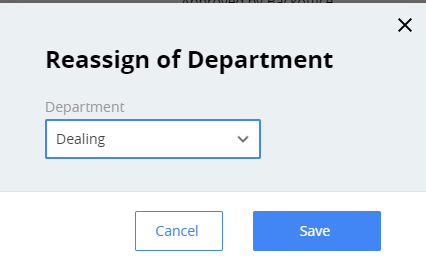
Click Save to run. The statuses of selected WD Requests will be changed to Forwarded to Backoffice or Forwarded to Dealing, and the Department in the WD Request Card will be respectively changed.
Recommended and available amount
When a customer creates the WD request in Client Area, the system shows them:
The Recommended Amount for withdrawal is a safe way to keep trades,
The Available amount for withdrawal is the minimum to perform withdrawal without closing the open trades.
Recommended amount for withdrawal (used in Client Area) is calculated according to formula:
| Recommended Amount = Equity – Margin * MinimumLevelGeneralLimit / 100 – Sum of Opened WD requests OR Recommended Amount = (Equity – Credit) – Sum of Opened WD requests |
|---|
MinimumLevelGeneralLimit: the value is taken from Config section, key WithdrawalRequest:MinimumLevelGeneral
Sum of Opened WD requests means sum of Requested Amounts of all WD requests for this customer in states:
- New
- Awaiting Docs
- Approved by CS
- Approved by Retention.
The available amount for withdrawal is calculated according to the formula:
| Available Amount = Free Margin – Sum of Opened WD requests OR Available Amount = (Equity - Credit) – Sum of Opened WD requests |
|---|
The available amount is displayed in the Customers and WD Requests sections:
WD Requests -> WD Request Card ->Withdrawal details area
WD Requests -> WD Request Card -> Approve WD request popup (if balance is insufficient for withdrawal operation)
Customers -> Depositor Card > Add WD request popup
Create WD Request
You can create a WD Request manually from the Customer card.
- Open the Customers section. Find the depositor needed using filters and click the link with the customer’s name.
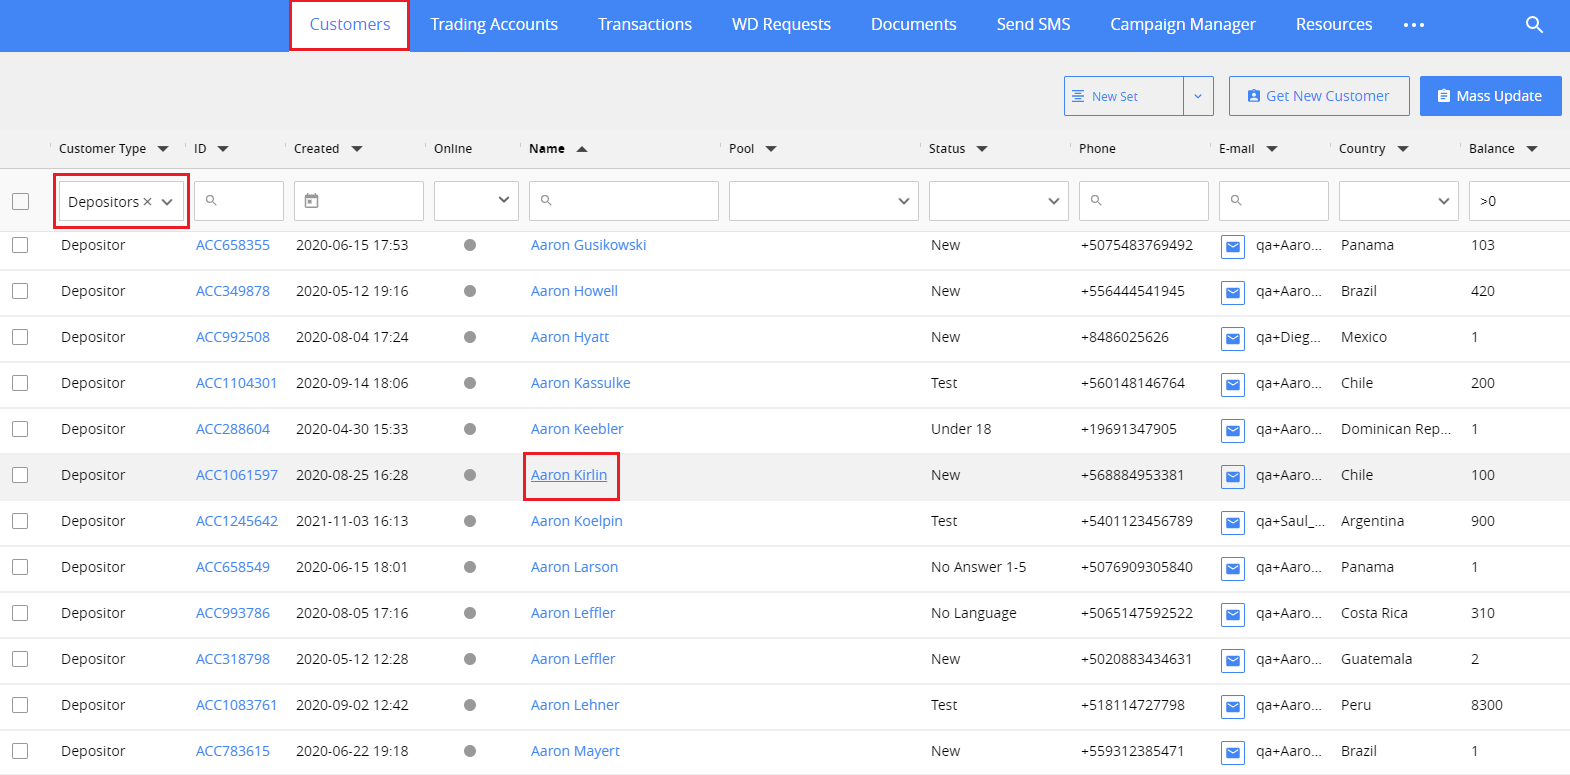
- In the opened customer card click Add WD Request button.
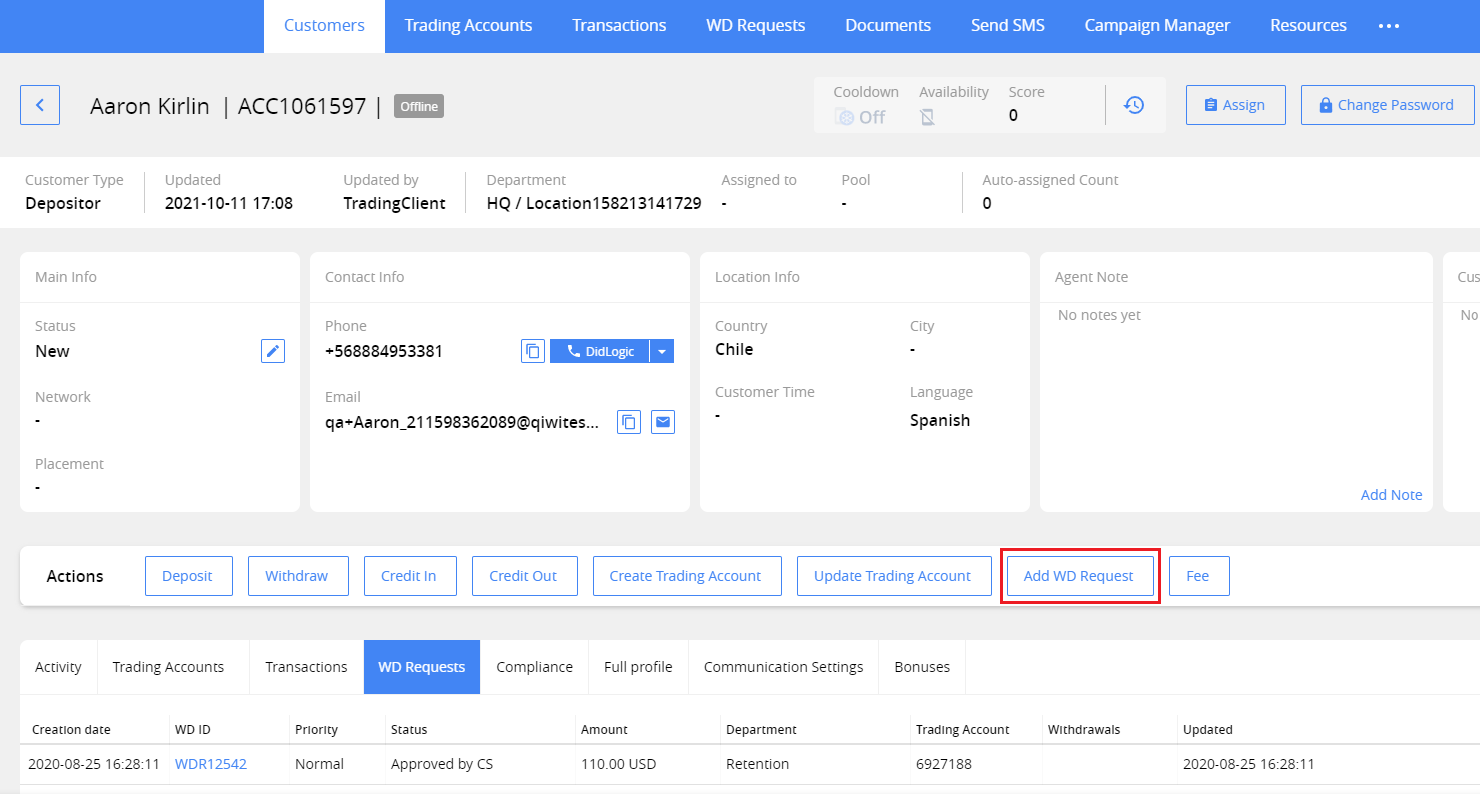
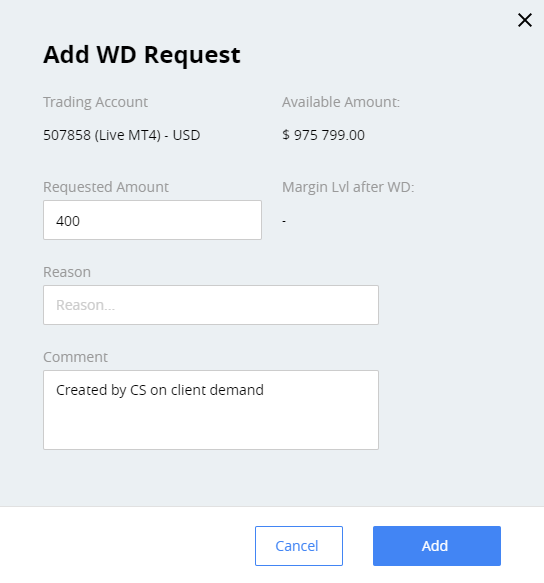
- In the window opened:
Select the Trading Account to make a withdrawal. If the customer has only one account, it will be selected automatically, and the field will be grayed out.
Enter the Requested Amount for withdrawal. It must be less than Available Amount.
Type the reason, if needed. You can also edit the autocompleted comment. Comment is required.
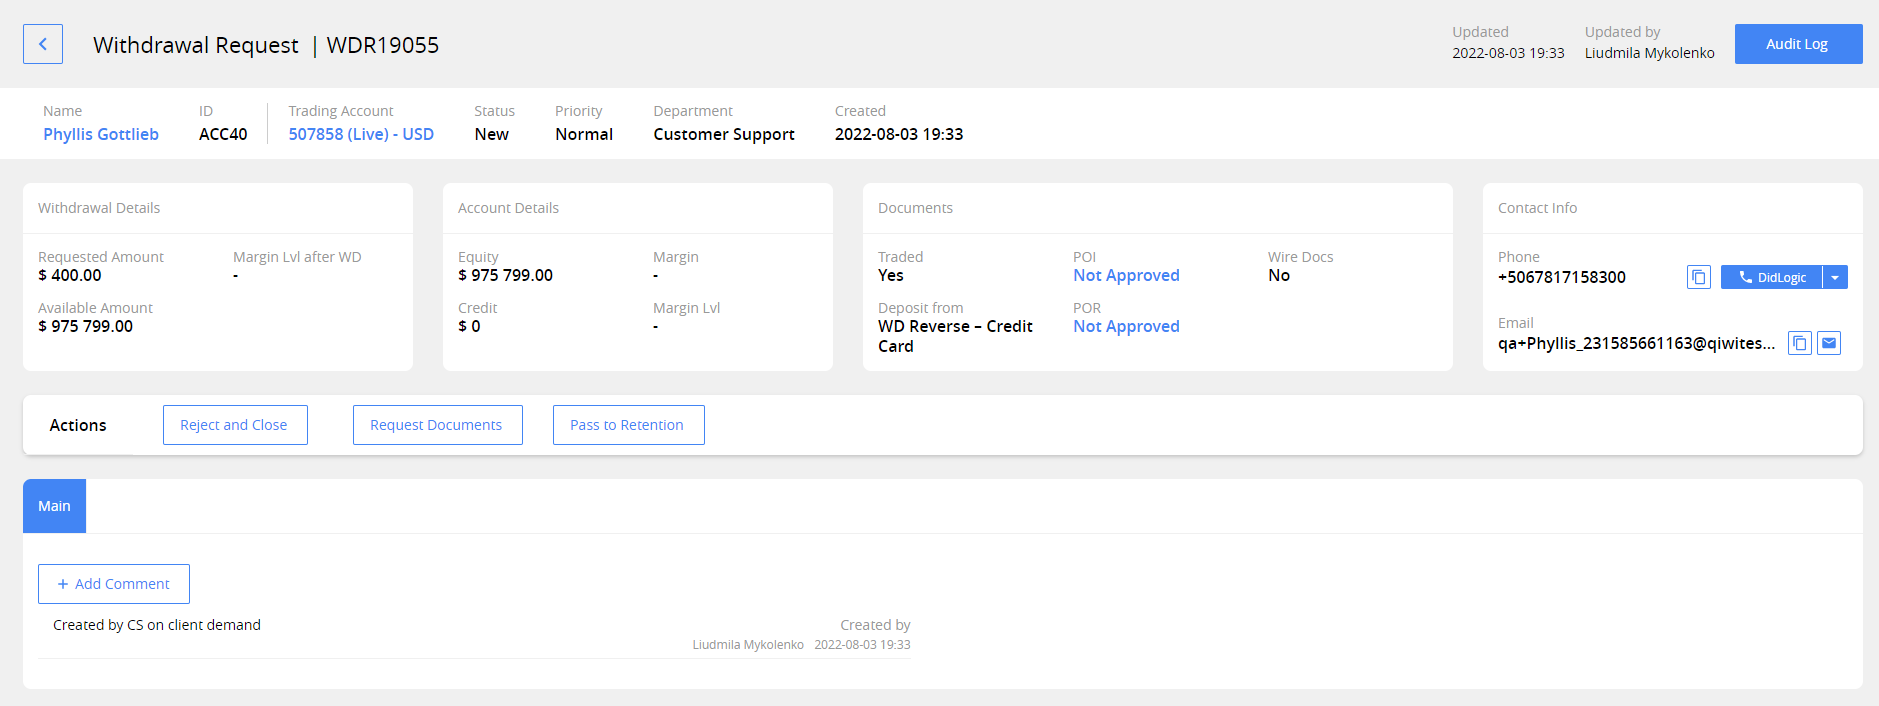
- After clicking Add, you will be redirected to the WD Request section, on the created WD Request card. The WD Request is created in the New status. In the Main area you can see the comment added. In the Audit Log, you can see the name of the user who created the record.
- You can also see the new WD Request in the customer card.